AeroPress Filters: How to Use Paper, Steel and Cloth Discs
Welcome to the “Beginner’s Guide to Using AeroPress Micro-Filters,” your essential resource for mastering the art of using AeroPress micro-filters in your coffee-making routine. This concise yet complete guide provides step-by-step instructions and invaluable tips to improve your brewing experience. By the end of this article, you will have a clear understanding of how to effectively use the AeroPress micro-filters, ensuring a consistently smooth and delightful cup of coffee every time.
To use AeroPress filters, set a paper micro-filter in the cap, wet it with hot water so it sticks, and screw the cap onto the chamber. Brew, press slowly for 20 to 30 seconds, then pop the puck and filter into the compost. Metal discs sit in the cap the same way but need a rinse after every brew.
Beginner’s Guide to Using AeroPress Micro-Filters
Have you recently acquired an AeroPress and are wondering how to get the best brew using its micro-filters? Whether you’re a novice or have some experience, mastering the use of AeroPress micro-filters can significantly improve your coffee game. This guide will walk you through everything you need to know about AeroPress micro-filters, from understanding their purpose to perfecting your brewing technique.
What Is an AeroPress Micro-Filter?
An AeroPress micro-filter is a small, circular paper filter that sits at the bottom of your AeroPress brewing apparatus. These filters are designed to be single-use and are a critical component for ensuring you get a smooth and grit-free cup of coffee. Unlike regular paper filters used in drip coffee makers, AeroPress micro-filters are specifically matched to fit the AeroPress.
The Purpose of AeroPress Micro-Filters
So why exactly do you need these specialized micro-filters? Their primary purpose is to:
- Filter Out Coffee Grounds: They prevent coffee grounds from seeping into your final brew.
- Improve Flavor: By removing fine particles and oils, they produce a cleaner, smoother taste.
- Ease of Use: Designed to be easily disposed of after each use, making your brewing experience more convenient.
Types of AeroPress Micro-Filters
Although AeroPress traditionally comes with its own branded micro-filters, you have a few different options to choose from. Let’s explore each type in detail.
Paper Micro-Filters
These are the standard filters that come with the AeroPress. Made of paper, they are both disposable and biodegradable.
Pros:
- Affordable
- Single-use, ensuring a consistent flavor without any residual oils or particles
- Easy to find
Cons:
- Can contribute to waste if not composted
- Some coffee enthusiasts claim they strip certain oils and flavors
Metal Micro-Filters
Metal filters, usually made from stainless steel, are becoming increasingly popular. They are reusable and can be used hundreds of times with proper care.
Pros:
- Durable and long-lasting
- Allows more oils and flavors to pass through, enhancing the coffee’s richness
- Environmentally friendly
Cons:
- Requires cleaning after each use
- Some users find metal filters allow a bit of fine coffee sediment into the cup
Cloth Micro-Filters
A less common option, cloth filters are reusable and offer a unique balance between paper and metal filters.
Pros:
- Reusable and eco-friendly
- Allows more flavors and oils to pass through while still filtering out most sediments
- Provides a unique mouthfeel and taste profile
Cons:
- Requires consistent cleaning and maintenance
- Harder to find
How to Insert AeroPress Micro-Filters Correctly
Getting the micro-filter insertion correct is key for a smooth brewing process. Here’s a step-by-step guide on how to do it.
Step 1: Prepare the Filter
Whether you’re using a paper, metal, or cloth filter, make sure it’s clean and ready. If you’re using a paper filter, consider rinsing it briefly with hot water to remove any papery taste.
Step 2: Insert the Filter
Place the filter inside the cap of the AeroPress. The filter should fit snugly within the circular groove designed to hold it.
Step 3: Attach the Cap
Screw the cap onto the bottom of your AeroPress. Ensure it is tightly secured to prevent leaks during the brewing process.

Brewing Techniques for Using AeroPress Micro-Filters
Knowing how to brew with AeroPress micro-filters can make all the difference. Let’s look at the two most common brewing techniques: the standard method and the inverted method.
Standard Brewing Method
The standard method involves placing the AeroPress directly on top of your coffee mug and pushing down. Here’s how to do it.
- Boil Water: Start by boiling water and allowing it to cool for about a minute, aiming for a temperature between 195-205°F (90-96°C).
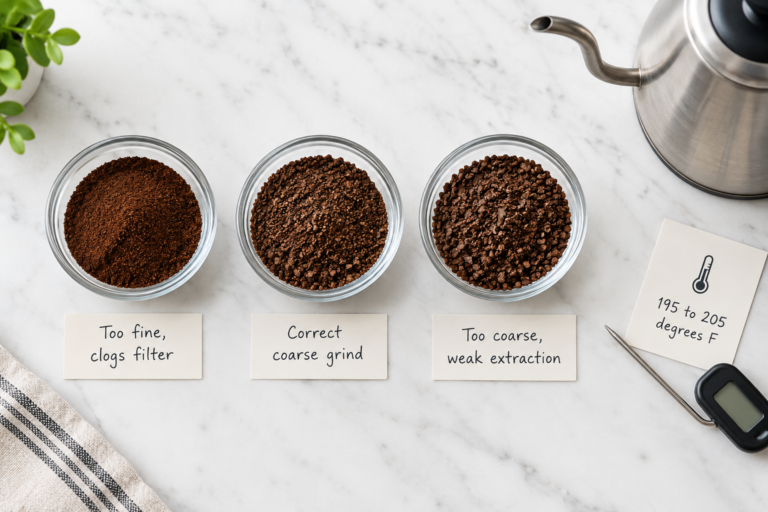
- Grind Coffee: Grind your coffee beans to a medium-fine consistency.
- Insert Filter: Place the micro-filter inside the cap and secure it to the main chamber.
- Add Coffee: Add the ground coffee into the chamber.
- Add Water: Pour the hot water into the chamber up to the desired level.
- Stir: Stir the mixture to ensure the coffee grounds are saturated.
- Press: Position the AeroPress over your mug and press down slowly but firmly, taking about 20-30 seconds.
Inverted Brewing Method
This method involves flipping the AeroPress upside down to steep the coffee longer before pressing. Here’s how to perform the inverted method.
- Prepare AeroPress: Set the AeroPress upside down, with the plunger at the bottom and the open end facing up.
- Insert Filter: Insert the micro-filter inside the cap but don’t attach it yet.
- Grind Coffee: Grind your coffee beans to a medium-fine consistency.
- Add Coffee: Add the ground coffee into the inverted AeroPress.
- Add Water: Pour hot water up to the desired level.
- Stir: Stir the mixture to ensure the coffee grounds are saturated.
- Steep: Allow the coffee to steep for about 1-2 minutes.
- Attach Cap: Carefully attach the cap with the filter.
- Flip and Press: Flip the AeroPress onto your cup and press down steadily.
Common Mistakes and How to Avoid Them
Using AeroPress micro-filters can be straightforward, but there are common mistakes that beginners often make. Let’s outline them along with how to avoid them.
Mistake 1: Incorrect Water Temperature
Using water that’s too hot or too cold can affect the taste of your coffee. Always aim for a temperature between 195-205°F (90-96°C).
Mistake 2: Not Rinsing the Paper Filter
Not rinsing the paper filter can impart a papery taste to your coffee. Always rinse it briefly with hot water before brewing.
Mistake 3: Using Too Much or Too Little Coffee
Finding the right coffee-to-water ratio is key for a balanced cup. A general guideline is to use one scoop of coffee per every 100ml of water. Adjust according to your taste preferences.
Mistake 4: Inconsistent Pressing
Pressing too quickly or unevenly can lead to an inconsistent brew. Aim for a slow, steady press that takes about 20-30 seconds.
Cleaning and Maintenance
Proper care and maintenance of your AeroPress and filters can extend their lifespan and ensure you get the best brews.
Cleaning Paper Filters
Since paper filters are single-use, you simply need to dispose of them after each use. But, composting them is an eco-friendly option.
Cleaning Metal and Cloth Filters
For metal and cloth filters, thorough cleaning is essential.
- Rinse Immediately: Rinse the filter immediately after use to remove coffee grounds.
- Deep Clean: For metal filters, use a brush to scrub off any residual oils. Cloth filters can be boiled periodically to remove built-up oils and residues.
- Dry Completely: Ensure the filter is completely dry before storing to prevent any mold or mildew growth.
Sustainable Practices
As a coffee enthusiast, you might be worried about the environmental impact. Here are some sustainable practices to consider:
Reuse and Recycle
- If using paper filters, consider composting them.
- Choose reusable filters like metal or cloth to minimize waste.
Energy Efficiency
Use an energy-efficient kettle to boil water and unplug electrical appliances when not in use.
Tips for the Perfect AeroPress Coffee
To wrap things up, here are some bonus tips for brewing the perfect cup with AeroPress micro-filters.
Choosing the Right Coffee Beans
Opt for freshly roasted, high-quality coffee beans. Experiment with various roasts to find the one that suits your taste.
Consistent Grinding
Use a good burr grinder to ensure even grind size, which significantly affects the flavor and consistency of your coffee.
Experimentation
Don’t be afraid to tweak the variables like water temperature, grind size, and brewing time. Experimenting will help you find your perfect cup.
AeroPress Filter Options and Prices in 2026
AeroPress now sells four filter families in two sizes, and the official filter shop lists these prices for a single pack in September 2026. Standard filters fit the AeroPress Original and AeroPress Go. The XL filters are for the AeroPress XL only.
| Filter | Standard size | XL size | What it leaves in the cup |
|---|---|---|---|
| Paper Micro-Filters (white) | $9.95 for 350 | $11.95 | Clean, bright, almost no sediment |
| Natural Paper Micro-Filters (unbleached) | $9.95 | $12.95 | Clean cup, rinse well to avoid a paper note |
| Stainless Steel Filter | $14.95 | $19.95 | More oils and body, a little fine silt |
| Gold Tone Filter | $19.95 | $24.95 | Body of metal with finer filtration than steel |
At $9.95 for 350, a paper filter costs under 3 cents a brew. The steel disc pays for itself after roughly a pack and a half, so the real question is whether you like the heavier cup.
Which AeroPress Filter Should You Buy?
- You drink it black and like a crisp cup: white paper. It is the reference taste most AeroPress recipes are written for.
- You want French press body without the sludge: the stainless steel disc. Grind one step coarser than you would for paper.
- You travel with an AeroPress Go: keep a small stack of paper in the chamber and a metal disc as the backup that never runs out.
- You make espresso style concentrates for milk drinks: paper or Gold Tone, since fine silt shows up more in a small, strong shot.
Troubleshooting AeroPress Filter Problems
- The plunger will not go down: the grind is too fine or the paper is clogged with fines. Go coarser and press with steady pressure instead of body weight.
- The paper falls out when you screw on the cap: wet it first. A damp filter clings to the cap grid and stays put.
- Grit at the bottom of the mug with a metal filter: grind coarser, and stop pressing at the first hiss of air.
- Coffee drips through before you press (standard method): this is normal. Stir quickly and keep the steep short, or use the inverted method.
- The cup tastes like cardboard: rinse the paper with hot water, and rinse unbleached paper twice.
If the grind is the culprit, our best manual coffee grinder guide covers hand grinders that fit in a travel kit alongside the AeroPress, and the AeroPress vs French Press comparison explains how the filter changes body and cleanup.
Aeropress filters: FAQ
How many filters come in an AeroPress pack?
A standard pack of AeroPress Paper Micro-Filters holds 350 filters and lists at $9.95 on aeropress.com. That is close to a year of daily brewing for one person.
Do AeroPress Go filters fit the original AeroPress?
Yes, the standard micro-filters fit both the AeroPress Original and the AeroPress Go. The AeroPress XL takes its own larger XL filters, sold separately.
Can you reuse an AeroPress paper filter?
Yes, a paper filter can handle a few brews if you rinse it right after pressing and let it dry flat. Swap it out once it tears, turns brown, or starts to taste stale. More brewing guides live on the Coffee Rank IQ homepage.
Conclusion
Mastering the use of AeroPress micro-filters is a routine that involves understanding the types of filters, their correct usage, and the brewing techniques. By following this guide, you’ll be well on your way to brewing a smooth, delicious cup of coffee with your AeroPress. Start experimenting today, and soon you’ll be able to enjoy a brew that’s matched exactly to your taste preferences. Happy brewing!
Keep Exploring Coffee Rank IQ
- Coffee Rank IQ home: reviews, brewing guides, and coffee science
- Complete Guide To Using A Stainless Steel Coffee Filter For Aeropress
- The Complete Guide To Flat Bottom Paper Coffee Filters
- The Complete Guide To Fellow Stagg [X] And [XF] Paper Filters
- How To Use Hario V60 Paper Coffee Filters For The Best Brewing Results