
How to Use an Espresso Machine: Shots, Steam, and Upkeep
Picture yourself in a bustling café, the aroma of freshly brewed coffee filling the air. As customers queue up for their caffeine fix, you find yourself at the helm of a state-of-the-art espresso machine, ready to embrace the art of coffee-making. In this article, you will discover the secrets to mastering the espresso machine operation, unraveling the detailed dance between pressure, temperature, and extraction time. From pulling the perfect shot to achieving velvety microfoam, get ready to start a routine that will improve your coffee-making skills to new heights. So, grab your tamper and let’s brew some excellence!
How to use an espresso machine, in short: To use an espresso machine, let it heat fully, grind about 18 grams of coffee fine, level and tamp it in the portafilter, and pull about 36 grams of espresso in 25 to 30 seconds. Purge the steam wand before and after milk, rinse the group after each session, and descale on your manual’s schedule.
Understanding Espresso Machine Basics
Learn about different types of espresso machines
To truly excel in espresso machine operation, you must first familiarize yourself with the different types of espresso machines available. There are three main types: manual, semi-automatic, and super-automatic.
manual espresso machines require the most skill and experience to operate. These machines require you to manually control the water flow and pressure throughout the brewing process. While they offer the most control over the final product, they can be challenging to master.
semi-automatic machines are a popular choice for home baristas. These machines automate the water pump, but still require you to manually start and stop the brewing process. This gives you more control than with a super-automatic machine, but with a bit more convenience.
Super-automatic machines are the easiest to operate. They fully automate the brewing process, from grinding the beans to pulling the shot. While they may lack the precision and customization options of manual or semi-automatic machines, they are perfect for those seeking convenience and ease of use.
Familiarize with different parts of an espresso machine
Regardless of the type of espresso machine you choose, it is essential to familiarize yourself with its different parts. Understanding how each component functions will help you troubleshoot any issues that may arise and tune your espresso-making skills.
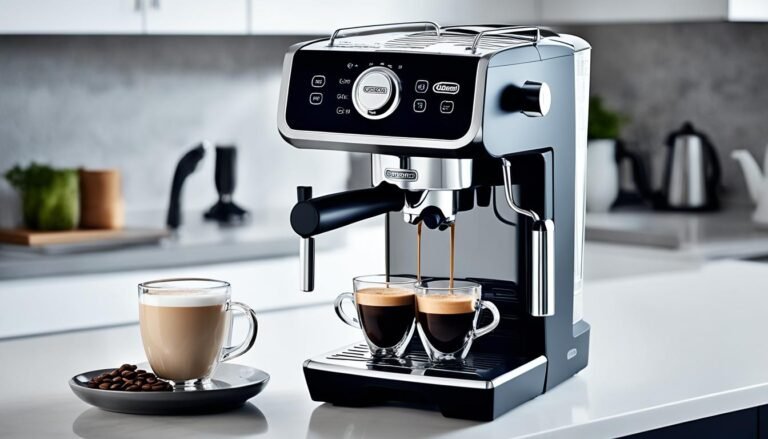
Some key components of an espresso machine include the portafilter, grouphead, boiler, steam wand, and control panel. The portafilter is where you insert your ground coffee and attach it to the machine. The grouphead is responsible for delivering hot water to the coffee. The boiler heats the water to the proper temperature, and the steam wand is used to froth milk for drinks like cappuccinos and lattes. The control panel allows you to adjust settings like shot time and temperature.
Understand the mechanism and function of each part
To truly excel in operating an espresso machine, you need to understand how each part of the machine works together. It is not enough to simply know their names and functions; you must understand how they interact and their role in the espresso-making process.
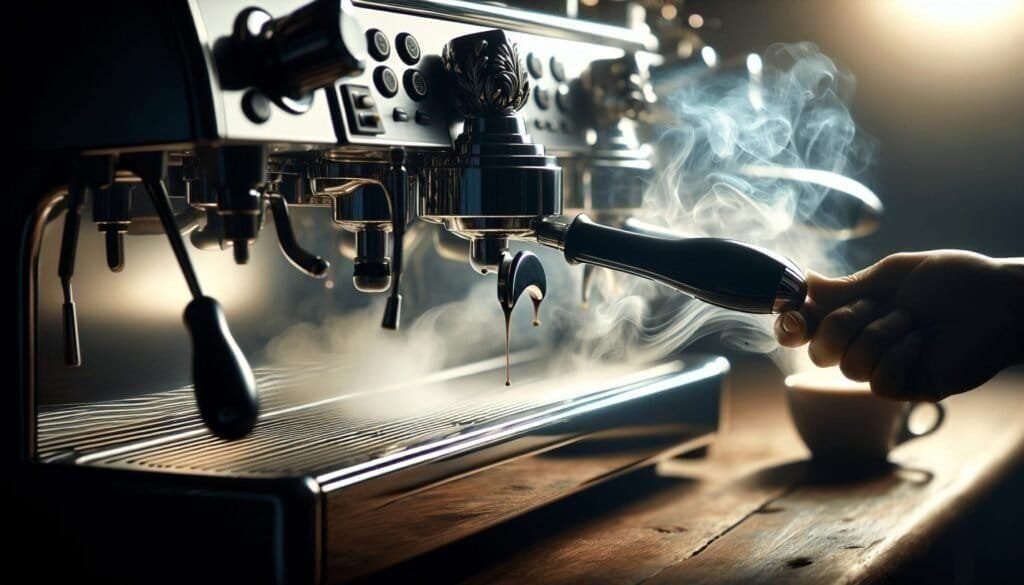
For example, the portafilter and grouphead work together to create pressure and force hot water through the coffee grounds. The steam wand uses steam from the boiler to create microfoam for milk frothing. By understanding these mechanisms and functions, you can make adjustments to achieve the perfect extraction and create delicious espresso shots.
Espresso Bean Selection
Differentiating between different types of espresso beans
The key to a great espresso shot starts with the selection of the right beans. Understanding the different types of espresso beans available will help you make an informed choice and achieve the desired flavor profile.
The two main types of espresso beans are Arabica and Robusta. Arabica beans are more commonly used in specialty coffee, known for their delicate flavors and aromas. On the other hand, Robusta beans are generally less expensive and contain higher caffeine content. They are often used in espresso blends to add strength and crema.
How bean origin influences flavor
The origin of the beans plays a significant role in the flavor of the espresso. Beans from different regions around the world have distinct flavor profiles due to variations in soil, climate, and growing conditions.
For example, beans from Central and South America tend to have a well-balanced flavor with hints of chocolate and nuttiness. African beans often offer bright acidity and fruity notes. Indonesian beans are known for their earthy and spicy flavors.
Understanding how bean origin influences flavor will allow you to choose beans that align with your taste preferences and create the perfect espresso shot.
Choosing the right espresso beans for your taste
The final step in selecting espresso beans is choosing the right ones for your specific taste preferences. Consider the flavor profiles you enjoy and experiment with different blends and origins to find the perfect combination.
Some factors to consider when choosing beans include the roast level, flavor notes, and the intensity of the coffee. Whether you prefer a light roast with floral and fruity flavors or a dark roast with bold and smoky notes, there is a perfect espresso bean out there for you.
Experimentation and exploration are key to finding the beans that will truly improve your espresso game and help you excel in your machine operation.
Grinding the Beans
Importance of the freshness of beans
Once you’ve acquired your desired espresso beans, it’s key to understand the importance of their freshness in achieving a superior shot of espresso. Coffee beans start to lose their flavors and aromas soon after they are roasted, so it’s best to grind them just before brewing.
When you grind the beans, the surface area increases, exposing the coffee grounds to oxygen. This oxidation process accelerates the degradation of flavors, resulting in a lackluster cup of espresso. By grinding the beans fresh for each shot, you can maximize the flavor potential and achieve a more vibrant and enjoyable espresso experience.
Choosing the right grinder
To excel in espresso machine operation, invest in a high-quality grinder that suits your needs. There are two main types of grinders: blade grinders and burr grinders.
Blade grinders are the more affordable option, but they can produce inconsistent grind sizes, leading to uneven extraction. For optimal results, it is recommended to opt for a burr grinder. Burr grinders provide more precise and consistent grinding, allowing you to dial in the perfect grind size for your espresso machine.
Perfecting the grind size and consistency
The grind size and consistency of your coffee grounds are key factors that directly impact the quality and taste of your espresso. The ideal grind size depends on the brewing method and the type of espresso machine you have.
For espresso machines, a fine and consistent grind is essential. The size of the grind should resemble fine sand, ensuring proper water extraction and optimal flavor extraction. Experiment with different grind sizes to find the sweet spot that produces the desired level of extraction and flavor in your espresso shots.
Consistency is equally important. Uneven or inconsistent grinds can lead to channeling, where water finds paths of least resistance through the coffee puck, resulting in an imbalanced extraction. Aim for a consistent grind to ensure even extraction, uniform flavor, and a well-rounded espresso shot.
Dosing and Tamping
Understanding the concept of dosing
Dosing refers to the amount of coffee grounds you use when preparing an espresso shot. It is important to strike the right balance between under-dosing, which can result in weak and sour shots, and over-dosing, which can lead to bitter and over-extracted shots.
The standard dose for a double shot of espresso is around 18-20 grams of coffee grounds, but this can vary based on personal preference and the specific espresso machine you are using.
Proper techniques for tamping espresso grounds
Tamping is the process of compacting the coffee grounds within the portafilter to create an even and consistent coffee puck. It is a critical step in achieving proper water flow and extraction.
To excel in espresso machine operation, it is essential to master the art of tamping. Start by distributing the coffee grounds evenly in the portafilter, ensuring there are no clumps or gaps. Place the tamper flat on top of the coffee and apply even pressure, using your arm and wrist rather than applying excessive force with your body weight.
The aim is to achieve a level and consistent tamp, creating an even surface for the water to flow through the coffee puck. Practice and experimentation will help you perfect your tamping technique and in the end improve the quality of your espresso shots.
Impact of dosing and tamping on espresso shots
Dosing and tamping are vital steps in the espresso-making process that significantly affect the quality and taste of your shots.
Proper dosing ensures that you use the appropriate amount of coffee grounds to achieve the desired strength and flavor in your espresso. Under-dosing can lead to weak and watery shots, while over-dosing can result in bitter and overpowering flavors.
Tamping, on the other hand, affects the water flow through the coffee puck. A proper and consistent tamp creates an even bed of coffee, allowing the water to extract the flavors evenly. Inconsistent tamping can lead to uneven extraction, resulting in imbalanced flavors and a subpar espresso shot.
By mastering the concepts of dosing and tamping, you can take control of your espresso-making process and deliver consistently excellent shots.

Pulling the Shot
Understanding extraction time
The extraction time, also known as shot time, refers to the duration it takes for water to pass through the coffee grounds in the portafilter. This is a critical factor in achieving a well-balanced and flavorful shot of espresso.
The typical range for shot time is around 25 to 30 seconds, with variations depending on personal taste preferences and bean characteristics. If the shot is too fast, it may be under-extracted and lack body and flavor. Conversely, if the shot is too slow, it may be over-extracted, resulting in bitterness and a heavy mouthfeel.
Understanding extraction time allows you to make adjustments to grind size, dosing, and tamping pressure to achieve the desired shot time and tune flavor extraction.
Mastering pressure control
Pressure control is another key aspect of pulling a perfect shot of espresso. The ideal pressure range is typically between 8 to 9 bars, but this can vary depending on the espresso machine and the specific beans being used.
To excel in espresso machine operation, it is essential to master the art of pressure control. This involves monitoring the pressure gauge or paying attention to the resistance felt while pulling the shot. Consistency in pressure throughout the extraction process helps to ensure even extraction and optimal flavor development.
By practicing and fine-tuning pressure control, you can improve the quality of your espresso shots and achieve consistency in flavor and crema.
Knowing when to stop a shot
Knowing when to stop the shot is a skill that sets apart average espresso makers from true experts. While the timing of the shot plays a role in achieving the desired flavor, relying solely on time can lead to inconsistent results.
To excel in operating an espresso machine, you must develop the ability to visually assess the shot and make decisions based on its appearance. The ideal shot will start with a dark, syrupy flow that gradually lightens to a rich, honey-like consistency. Once the flow becomes thin and pale, it is time to stop the shot.
This visual evaluation allows you to adjust the variables of the espresso-making process, such as grind size and dose, to achieve the perfect extraction. With practice and experience, you will become adept at recognizing the ideal moment to end the shot, resulting in consistently exceptional espresso.
Steam and Froth Milk
Selecting the proper milk for steaming
Steaming milk is a key element in creating popular espresso-based drinks like lattes and cappuccinos. To excel in this aspect of espresso machine operation, it is important to select the proper milk for steaming.
Whole milk is a commonly used option that produces a rich and creamy texture with a slightly sweet flavor. But, different types of milk can provide unique characteristics. For example, oat milk creates a velvety and slightly nutty taste, while almond milk adds a subtle nuttiness and a lighter texture.
Experiment with different types of milk to find the one that suits your taste preferences and complements the flavors of your espresso shots.
Steaming techniques for perfect froth
Creating perfect frothed milk requires mastering the steaming technique. It involves incorporating air into the milk, creating tiny bubbles that contribute to the desired creamy and velvety texture.
To excel in espresso machine operation, start by using a clean and cold stainless steel milk pitcher. Submerge the steam wand just below the surface of the milk, turn on the steam, and begin frothing. Position the pitcher at an angle to allow the steam wand to create a whirlpool effect, ensuring even distribution of heat and air.
As the milk heats up, lower the pitcher to maintain the ideal position, minimizing large bubbles and maximizing the incorporation of fine microfoam. Continuously monitor the temperature of the milk to prevent scorching or overheating.
Perfecting your steaming technique may take practice, but with time and attention to detail, you will be able to create beautifully frothed milk that improves the presentation and taste of your espresso-based beverages.
Timing the steaming process
The timing of the steaming process is key to achieving optimal milk texture and temperature. Steaming milk for too long can result in overheating and scorching, while under-steaming can lead to the milk being too cold and lacking proper texture.
To excel in espresso machine operation, aim for a steaming time of around 30 to 40 seconds. This allows the milk to reach a temperature of around 150°F to 160°F (65°C to 71°C), providing a perfect balance between heat and texture. Use a thermometer to measure the milk temperature until you develop the ability to gauge by touch.
By mastering the timing of the steaming process, you can ensure your milk is heated to the ideal temperature and achieve the perfect consistency for latte art and flavor integration.
Cleanup and Maintenance
Key espresso machine components to clean regularly
Proper cleanup and maintenance are essential for maintaining the longevity and performance of your espresso machine. Regular cleaning helps prevent the buildup of coffee oils, mineral deposits, and other residues that can affect the taste and quality of your shots.
Some key components that require regular cleaning include the portafilter, grouphead, steam wand, and the drip tray. The portafilter and grouphead should be rinsed after each use to remove any leftover coffee grounds. The steam wand should be wiped clean with a damp cloth to prevent milk residue from drying and clogging the nozzle.
Also, the drip tray should be emptied and cleaned regularly to prevent mold and bacteria growth. The frequency of deep cleaning depends on usage and manufacturer recommendations, but performing a thorough cleaning at least once a month is recommended.
Methods to descale the machine
Descaling is an important maintenance step to remove mineral deposits that accumulate over time. These deposits, commonly known as limescale, can clog the internal components, negatively impacting the performance of your espresso machine.
To descale your machine, use a citric or lactic acid descaler, either the manufacturer’s own or a commercial one. Skip vinegar: KitchenAid tells owners of its espresso machines not to use it, and a Cuisinart product developer told Tom’s Guide it can leave an odor and damage internal parts. Follow the manufacturer’s instructions or the specific descaling solution’s guidelines for the correct dilution ratio and process.
Typically, the descaling process involves running the descaling solution through the machine, followed by multiple rinses with clean water. It is key to thoroughly rinse the machine to remove any residual descaling solution before brewing your next shots. Neglecting to do so can result in a lingering aftertaste and potential damage to the machine.
Regular descaling will help maintain the optimal performance and extend the life of your espresso machine, ensuring that it continues to produce delicious shots for years to come.
Timely servicing for an optimized life of the espresso machine
While regular cleaning and maintenance play a significant role in espresso machine operation, it is also important to schedule timely servicing as recommended by the manufacturer. Professional servicing helps identify and address any potential issues, ensuring your machine operates optimally.
A qualified technician will inspect the internal components, perform necessary repairs, and tune the performance of your espresso machine. This can involve tasks such as replacing worn-out parts, recalibrating pressure settings, and checking electrical connections.
By adhering to a regular servicing schedule, you can prevent major breakdowns, prolong the lifespan of your machine, and ensure consistent performance for years to come.
Techniques for Latte Art
Creating a canvas for latte art
Latte art is a skill that adds an aesthetically pleasing touch to your espresso-based beverages. To excel in this artistic aspect of espresso machine operation, creating a smooth and even canvas for your artwork is essential.
Start by pouring a shot of espresso into a preheated cup. Gently swirl the cup to even out the crema and distribute any residual coffee oils. This provides a consistent base for your latte art and ensures that the colors and patterns stand out against the background.
Basic latte art designs to try
Once you’ve created a canvas for your latte art, you can start experimenting with basic designs. Some popular designs to try include the heart, tulip, and rosetta.
To pour a heart, start a few inches above the cup so the milk sinks under the crema, then lower the spout close to the surface in the center until a white circle spreads. When the cup is nearly full, lift the pitcher and pull a thin stream through the circle to shape the heart.
A tulip is a stack of small hearts. Pour one blob of white, stop, then push a second blob into the back of the first, and repeat two or three times. Finish by lifting the pitcher and drawing a thin line through the stack.
A rosetta starts with the spout low, near the far side of the cup. Wiggle the pitcher side to side so the milk folds into zigzag leaves while you slowly move back toward the near rim, then lift and pull a thin line through the middle to finish the fern.
With practice and patience, you can refine your latte art skills and create detailed and visually stunning designs that impress your customers and improve the overall espresso experience.
Common mistakes to avoid
While pursuing latte art excellence, it’s important to be aware of common mistakes that can hinder your progress. Avoiding these pitfalls will help you achieve better results and spruce up your espresso-based beverages.
One common mistake is pouring milk too quickly or forcefully, which can disrupt the crema and make it difficult to create defined patterns. It’s important to pour slowly and steadily, allowing the milk to blend with the espresso and creating a smooth transition between colors.
Another mistake is stopping the steam too early or too late. Milk pulled off the wand too soon stays thin and lukewarm, while milk pushed past about 160°F (71°C) loses its natural sweetness and the foam turns stiff and dry.
Also, not paying attention to the size of the cup and the volume of milk used can lead to imbalanced latte art. Experiment with different cup sizes and milk quantities to find the perfect balance that allows you to create detailed designs without overwhelming the cup.
Troubleshooting Common Issues
Addressing espresso machine leakage
Leakage is a common issue that espresso machine operators may encounter. To troubleshoot this problem, start by inspecting the machine and identifying the source of the leak.
Potential causes of leakage include loose connections, worn-out gaskets, and improper sealing of components. Check all the fittings and connections to ensure they are secure and tighten them if necessary. If you notice any damaged or worn-out gaskets, they may need to be replaced.
Keep in mind that leakage can also occur if the machine is not leveled properly. Adjust the machine’s position and ensure it is stable on the countertop.
If the issue persists despite your troubleshooting efforts, it is best to consult the manufacturer or seek assistance from a professional technician to diagnose and resolve the problem.
What to do when the machine is not heating
When an espresso machine fails to heat up, it can be frustrating and hinder your ability to brew delicious shots. To address this issue, there are a few potential areas to investigate.
Start by checking the power source and ensuring the machine is plugged in securely. If the machine has an on/off switch, make sure it is in the correct position. Also, verify that the circuit breaker or fuse has not tripped or blown.
If power is not the issue, the heating element or thermostat may be at fault. These components can wear out over time and require replacement. It is recommended to consult the manufacturer’s manual or contact a professional technician for further assistance in diagnosing and repairing the heating issue.
Handling inconsistent espresso shots
Inconsistent espresso shots can be a frustrating challenge for espresso machine operators. If you are experiencing inconsistencies in the quality and taste of your shots, there are a few factors to consider.
Start by examining your equipment and ensuring that all the components are clean, properly assembled, and functioning correctly. Buildup of coffee oils, mineral deposits, or worn-out parts can contribute to inconsistent shots.
Next, evaluate your technique and consistency in various steps of the espresso-making process, such as bean dosing, tamping pressure, grind size, and shot timing. Small variations in any of these variables can lead to inconsistent extraction and flavor profiles.
Lastly, consider the quality and freshness of your espresso beans. Using stale or poorly stored beans can result in inconsistent flavors and aromas. Invest in high-quality beans and store them properly to maintain their freshness.
By addressing these factors and fine-tuning your technique, you can minimize inconsistencies and achieve more consistent and exceptional espresso shots.
Practices for Continuous Improvement
Keeping up-to-date with latest espresso trends
To excel in espresso machine operation, it is important to stay informed and updated on the latest espresso trends and advancements in the coffee industry. This includes staying current with the latest brewing techniques, espresso machine technologies, and emerging trends in coffee culture.
Subscribe to coffee industry publications, follow influential coffee professionals and baristas on social media, and attend coffee-related events and expos. Engaging with the coffee community and staying abreast of new developments will enable you to refine your skills, discover new flavor profiles, and keep your espresso offerings relevant and exciting.
Improving your palate to appreciate espresso subtleties
Developing a refined palate is a key aspect of excelling in espresso machine operation. By training your taste buds and honing your ability to distinguish flavor nuances, you can better understand the intricacies of different coffee beans and extraction techniques.
Engage in coffee cupping sessions, where you can compare and analyze the flavors of different coffees side by side. Take note of the unique characteristics and subtle differences in aroma, acidity, sweetness, and body.
Experiment with single-origin beans and different brewing methods to broaden your palate and deepen your understanding of flavor profiles. The more you expose yourself to a variety of tastes, the more adept you will become at identifying and appreciating the subtleties of espresso.
Joining communities for espresso lovers to learn and share
Being part of a community of espresso lovers can greatly improve your routine in espresso machine operation. By joining online forums, attending local coffee meetups, or participating in barista competitions, you can connect with like-minded individuals who share your passion for coffee.
Communities provide opportunities to learn from experienced baristas, exchange knowledge and tips, and gain inspiration from others’ achievements. Engage in discussions, ask questions, and share your own experiences to contribute to the collective growth and knowledge of the community.
Sharing and learning from others fosters continuous improvement, encouragement, and a sense of camaraderie within the espresso community. Embrace the community and let it fuel your drive to excel in espresso machine operation.
In conclusion, excelling in espresso machine operation requires a combination of knowledge, skill, and passion. Understanding the basics of espresso machines, selecting the right beans, and perfecting the grind, dose, and extraction are all key elements. Also, mastering the art of milk steaming, maintaining the machine, and continuously improving your skills through practice and exploration will improve your espresso-making abilities. With dedication, patience, and a creative spirit, you can become a true espresso aficionado and delight in the art of crafting exceptional espresso shots.
How to use an espresso machine: FAQ
How long should an espresso machine warm up?
It should warm up until the group head and portafilter are hot, which takes anywhere from seconds to many minutes depending on the heating system. Breville says the ThermoJet system in its Bambino reaches extraction temperature in 3 seconds, while machines with heavy brass group heads, such as the E61 design, take much longer, so follow the warm-up time in your manual. Lock the empty portafilter in while the machine heats; a cold one steals heat from the first shot.
Can you descale an espresso machine with vinegar?
Skip the vinegar and use a citric or lactic acid descaler, because several manufacturers warn against it. KitchenAid tells owners of its espresso machines not to descale with vinegar, and a Cuisinart product developer told Tom’s Guide it can leave an odor behind and damage internal parts. Breville’s Barista Express manual calls for one sachet of its descaling powder dissolved in 1 liter of water. Our coffee machine descaling guide covers how often to do it and what to buy.
What ratio should a beginner use for espresso?
Start with a 1:2 ratio: about 18 grams of ground coffee in and about 36 grams of liquid espresso out, in 25 to 30 seconds. Weigh both with a coffee scale with a built-in timer. If the shot runs fast and tastes sour, grind finer; if it crawls and tastes bitter, grind coarser. If you are still choosing a machine, our best espresso machines for beginners favor models that forgive a sloppy tamp, and the Coffee Rank IQ homepage has grinders to pair with them.
Keep Exploring Coffee Rank IQ
- Coffee Rank IQ home: reviews, brewing guides, and coffee science
- How to Guide to Using a Calphalon BVCLECMP1 Temp Espresso Machine w Steam Wand
- Best Espresso Machine for Beginners: 7 Picks That Forgive Mistakes
- Best Super Automatic Espresso Machine: Read the Cleaning Specs First
- Best Semi Automatic Espresso Machine for Real Home Kitchens