
Hario Skerton Pro Grind Settings for Every Brewer, Explained
The Hario Skerton Pro is a hand grinder with ceramic conical burrs, a glass jar and a crank that turns a bag of whole beans into fresh grounds in about a minute. It is simple to use once you know how the adjustment nut works. This guide covers assembly, grind settings for each brewer, a trick for repeating your favorite setting, and cleaning.
Hario skerton pro grind settings, in short: To use the Hario Skerton Pro, lift off the handle, set the grind with the adjustment nut (tighten for finer, loosen for coarser), and load up to 100 grams of beans. Refit the handle and crank clockwise at a steady pace until the hopper runs empty. Start mid range for pour over and loosen further for French press.
Hario Skerton Pro Grind Settings for Every Brewer, Explained
A hand grinder asks for 60 seconds of cranking and pays you back with coffee that tastes like the bag smelled. The Skerton Pro is one of the most common ways people make that trade, and a few small habits make it far more consistent.
Introduction to the Hario Skerton Pro Manual Coffee Grinder
The Hario Skerton Pro Manual Coffee Grinder stands out as one of the most popular manual coffee grinders on the market. Known for its high-quality construction and ease of use, it is an ideal choice for those who appreciate the finer aspects of coffee brewing. Let’s explore why this grinder is worthy of your consideration.
Why Choose the Hario Skerton Pro?
The Hario Skerton Pro offers no-nonsense grinding with adjustable settings, allowing you to achieve the precise grind consistency for various brewing methods. Its ergonomic design ensures that grinding coffee is not a strenuous task, and its compact size makes it suitable for travel.
Key Features of the Hario Skerton Pro
Here’s a brief look at some of the features that make the Hario Skerton Pro stand out:
- Ceramic Burrs: Ensures long-lasting sharpness and even grind.
- Adjustable Grind Size: Suitable for various brewing methods.
- Ergonomic Design: Easy-to-use crank handle that minimizes hand fatigue.
- Compact and Portable: Perfect for home use and travel.
- Sturdy Construction: Durable glass jar and a solid build that withstands daily use.
Getting Started with Your Hario Skerton Pro
Before you start grinding, it’s key to become familiar with the components of your Hario Skerton Pro and understand how to assemble and maintain it.
Components and Accessories
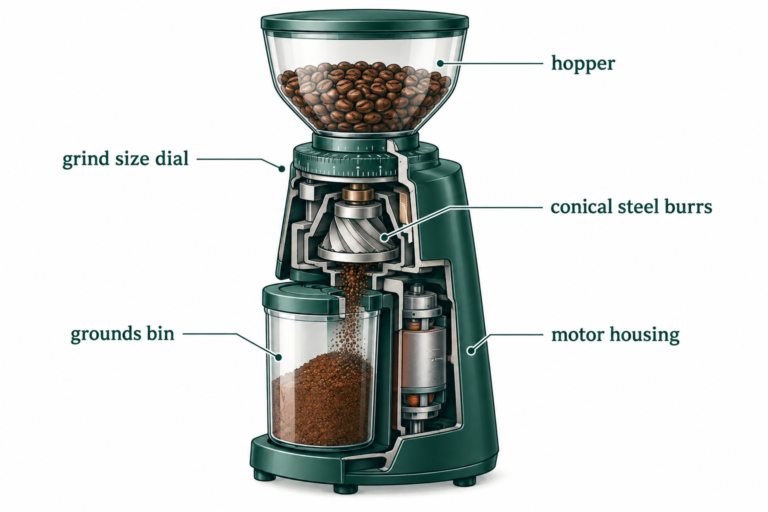
The Hario Skerton Pro comes with several components that need to be correctly assembled to ensure optimal performance. Here’s a table to help you identify each part:
| Component | Description |
|---|---|
| Hopper | Holds the coffee beans |
| Crank Handle | Used to manually grind the coffee beans |
| Burr Assembly | Contains the ceramic burrs |
| Adjustment Nut | Allows for grind size adjustments |
| Grind Handle Bracket | Connects the handle to the burr assembly |
| Glass Container (Jar) | Collects the ground coffee |
| Lid | Covers the glass container |
Assembling Your Hario Skerton Pro
- Insert the Burr Assembly: Place the burr assembly into the hopper.
- Attach the Crank Handle: Attach the crank handle to the burr assembly using the grind handle bracket.
- Secure the Glass Container: Screw the glass container onto the bottom of the hopper.
- Add the Lid: Place the lid on top of the glass container to keep the ground coffee fresh.
Initial Cleaning and Maintenance
To ensure a clean and effective grinding process, wash all removable parts with warm soapy water before first use. Regular cleaning is vital to maintain the grinder’s performance and extend its lifespan. Make sure to thoroughly dry all components to prevent moisture from affecting the performance of the grinder.

Mastering the Art of Grinding Coffee
Grinding coffee is more than just a means to an end, it’s an art form that significantly impacts the flavor of your brew. The Hario Skerton Pro gives you full control over this process.
Understanding Grind Size
The grind size can make or break your coffee brewing experience. Different brewing methods require different grind sizes. Here’s a quick look at how to achieve the perfect grind size with the Hario Skerton Pro:
Adjusting the Grind Size
- Fine Grind: For espresso and Turkish coffee, turn the adjustment nut clockwise.
- Medium Grind: Ideal for drip coffee makers and pour-over methods. Adjust the nut to a middle position.
- Coarse Grind: Perfect for French press and cold brew. Turn the adjustment nut counterclockwise.
Here’s a table summarizing different grind sizes for various brewing methods:
| Brewing Method | Grind Size | Adjustment Nut Direction |
|---|---|---|
| Espresso | Fine | Clockwise (tighten) |
| Turkish Coffee | Extra Fine | Further Clockwise |
| Drip Coffee | Medium | Middle Position |
| Pour-Over | Medium | Middle Position |
| French Press | Coarse | Counterclockwise (loosen) |
| Cold Brew | Extra Coarse | Further Counterclockwise |
Step-by-Step Grinding Process
- Measure Your Beans: Use a kitchen scale to measure the exact amount of coffee beans you need.
- Pour Beans into the Hopper: Remove the crank handle (if necessary) and pour the beans into the hopper.
- Adjust the Grind Size: Turn the adjustment nut to the desired setting for your brewing method.
- Start Grinding: Reattach the crank handle and begin turning it in a consistent, clockwise motion.
- Collect Grounds: Once you’ve ground all your beans, unscrew the glass container to collect your freshly ground coffee.
Tips for Consistent Grinding
- Consistency is Key: Maintain a consistent turning motion for uniform grounds.
- Mind the Fill Level: Avoid overfilling the hopper to prevent uneven grinding.
- Routine Cleaning: Regularly clean the grinder to prevent residue build-up that can affect flavor and performance.
Brewing Methods and Their Specific Grind Sizes
Choosing the ideal grind size is closely tied to the brewing method you plan to use. Below, we’ll explore different brewing techniques and how to best use your Hario Skerton Pro for each.
Espresso
Espresso demands a very fine grind to extract rich, intense flavors. Follow these steps:
- Set the Grinder to Fine: Tighten the adjustment nut to achieve a fine grind.
- Measure the Beans: Use 18-20 grams of coffee beans per shot of espresso.
- Grind Consistently: Turn the handle at a steady pace.
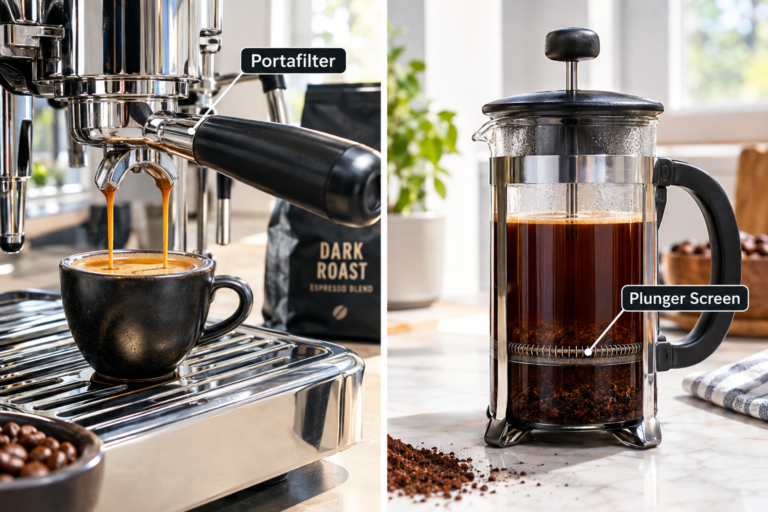
- Tamp Perfectly: Ensure coffee grounds are evenly tamped in the portafilter.
French Press
The French Press method requires a coarse grind to achieve a full-bodied flavor and prevent the coffee grounds from passing through the filter.
- Set the Grinder to Coarse: Turn the adjustment nut counterclockwise until it’s loose enough for a coarse grind.
- Measure the Beans: Use 60-70 grams of coffee per liter of water.
- Grind Slowly: Maintain a consistent motion to ensure uniformity.
Pour-Over
A medium grind is ideal for pour-over methods, like the Hario V60 or Chemex, which allows for the right amount of extraction.
- Set the Grinder to Medium: Adjust the nut to the middle position.
- Measure the Beans: Use 15-18 grams of coffee per 250 ml of water.
- Grind Consistently: Maintain an even turning pace.
Cold Brew
Cold brew requires an extra coarse grind for a smooth, less acidic coffee.
- Set the Grinder to Extra Coarse: Turn the adjustment nut further counterclockwise.
- Measure the Beans: Use 80-100 grams of coffee per liter of water.
- Grind with Ease: Slowly grind the beans to maintain uniformity.
Maintenance and Troubleshooting
To keep your Hario Skerton Pro in optimal condition, regular maintenance and occasional troubleshooting are essential.
Cleaning Your Grinder
To prevent any old coffee residue from affecting the taste of your fresh coffee, regular cleaning is key. Follow these steps for complete cleaning:
- Disassemble the Grinder: Separate the hopper, burr assembly, and glass container.
- Wash Components: Use warm soapy water to clean removable parts.
- Dry Thoroughly: Ensure all parts are completely dry before reassembling.
- Monthly Deep Clean: Take the burr assembly apart, brush out trapped grounds and oils, and wipe the burrs dry before reassembling.
Troubleshooting Common Issues
Despite its solid construction and design, you may encounter occasional issues. Here’s how to address them:
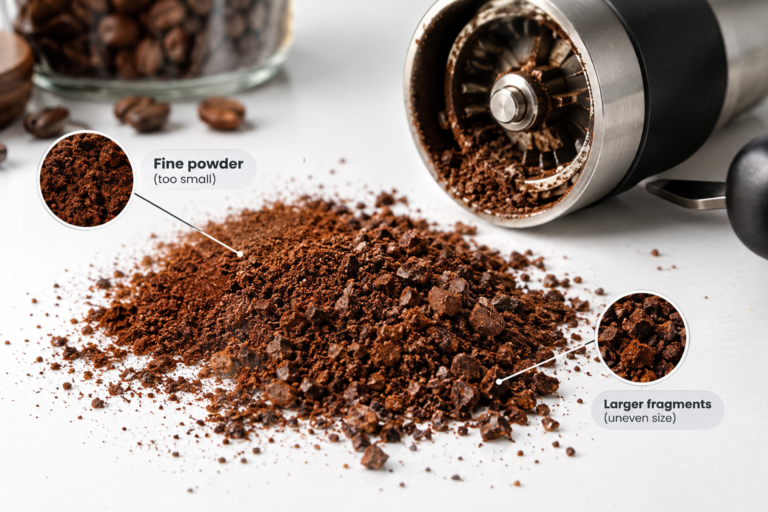
- Uneven Grind: This may be caused by improper grind setting. Readjust the nut to ensure it is securely in place.
- Stuck Grinder: If the handle becomes difficult to turn, check for any lodged coffee particles and clean them out.
- Weird Noises: Grinding noises may indicate that some parts are not properly aligned. Disassemble, clean, and reassemble to ensure everything is in order.
Tips for Prolonged Usage
To extend the lifespan of your Hario Skerton Pro, here are some useful tips:
Avoid Overfilling
Avoid overloading the hopper with beans, as it can strain the burr assembly and lead to wear and tear.
Regular Check-ups
Periodically check all components for wear and tear. Replace any worn-out parts promptly to maintain the grinder’s efficiency.
Store Properly
Store the grinder in a dry, cool place to prevent any moisture-related issues. If you frequently travel, consider a protective case.
Hario Skerton Pro Specs and Price in 2026
The Skerton Pro (model MMCS-2B) is still in Hario’s lineup. Hario USA lists it at $58.50, though it showed as sold out on Hario’s own store in September 2026, so check coffee retailers if you need one this week.
| Spec | Hario Skerton Pro |
|---|---|
| Burrs | Conical ceramic |
| Capacity | 100 g of coffee |
| Jar | Heatproof borosilicate glass |
| Handle | Aluminum |
| Hopper, lid and grip | Polypropylene |
| Size | 167 x 95 x 195 mm |
| List price | $58.50 at Hario USA |
That 100 g capacity covers a full 34 oz French press or four pour overs in one fill. It also means the jar gets heavy, so hold the grinder by its grip rather than the glass.
Set a Zero Point So You Can Repeat a Grind
The fastest way to lose a good cup is forgetting where the nut was. Give yourself a reference point.
- Empty the hopper. Tighten the adjustment nut gently until the handle will not turn. That is zero, where the burrs touch. Do not force it past that point.
- Back the nut off slowly and count each step or quarter turn you make.
- Grind a small test dose and compare it with the chart above: powdery for espresso, table salt for pour over, coarse sea salt for French press.
- Write the count on a strip of tape on the jar lid, one number per brewer.
Next time you switch from French press to pour over, go back to zero and count out to your number. It takes 20 seconds and saves a wasted brew.
Where the Skerton Pro Fits, and Where It Struggles
This grinder shines for pour over, AeroPress and drip, where a medium grind hides small variations. It is slow at espresso fineness, and fine adjustments for dialing in a shot are hard to repeat, so pair it with a pressurized basket or step up to a dedicated espresso grinder if shots are your main drink. At very coarse settings it makes more fines than a premium hand grinder, which can leave sludge in a French press. Our best manual coffee grinder guide compares it with steel burr options, and the pour over coffee ratio guide gives you the grams to weigh before you start cranking. More grinder and brewer guides live on the Coffee Rank IQ homepage.
FAQ
Can the Hario Skerton Pro grind fine enough for espresso?
Yes, it can reach espresso fineness, but it is slow and hard to fine tune. Grinding 18 grams at that setting takes real effort, and the small changes you need to dial in a shot are difficult to repeat. It works best with pressurized espresso baskets or a Moka pot.
How much coffee does the Skerton Pro hold?
The Skerton Pro holds 100 grams of coffee, according to Hario. That is enough for a 1 liter French press at a 1:15 ratio or several single cups of pour over.
Can you wash the Hario Skerton Pro?
Yes, you can wash the glass jar, lid and hopper in warm soapy water. Brush the burrs clean rather than soaking them, and let every part dry completely before you reassemble, since damp grounds clump and stick in the burrs.
Conclusion
The Skerton Pro gives you fresh grounds for pour over, drip, AeroPress and French press at a fraction of the price of a good electric burr grinder, and it packs flat enough for a weekend away.
Understanding its key features, mastering grind size adjustments, and maintaining the grinder properly will enable you to enjoy a wide range of coffee brewing methods with optimal results. Treat your coffee grinding as an art and a science, and you’ll soon discover the full potential of your beans, achieving a perfect cup every time.
Set your zero point, write down your numbers, and the grinder will give you the same cup every morning.
Keep Exploring Coffee Rank IQ
- Coffee Rank IQ home: reviews, brewing guides, and coffee science
- Best Ways To Customize Temperature Settings On The Behmor Brazen Plus Coffee Maker And Improve Your Brewing Experience By Controlling The Extraction Process For A Perfect Cup Of Coffee Every Time
- Best Coffee Grinder for Every Brew Method and Budget
- Dirty Chai: The Espresso and Chai Latte Combo Explained
- What Is a Doppio? The Double Shot Explained Simply