Blue Bottle Dripper Recipe: Ratios, Pour Times and Grind Size
Introducing “The Complete Guide to Using a Blue Bottle Coffee Dripper”, your essential resource for mastering the intricacies of this specialty coffee device. This complete guide aims to improve your coffee brewing skills, ensuring that you achieve a perfect cup every time. From understanding the nuances of the dripper’s design to step-by-step instructions on optimizing grind size and water temperature, you will be equipped with all the knowledge needed to open up the full potential of your Blue Bottle Coffee Dripper.
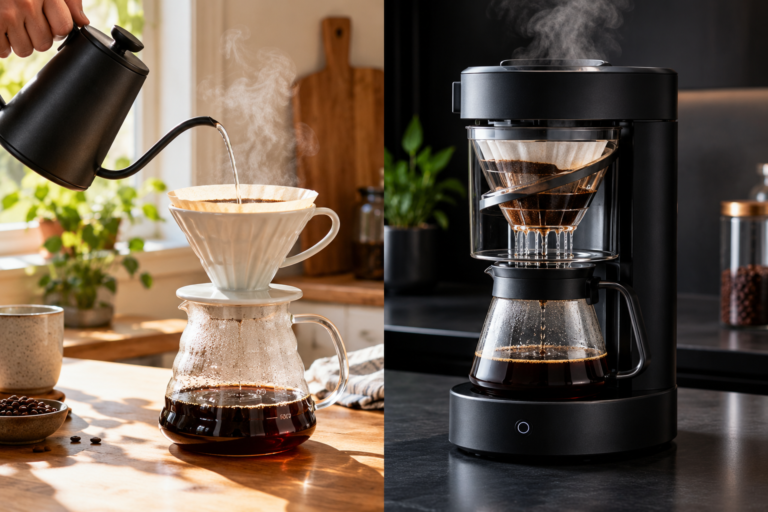
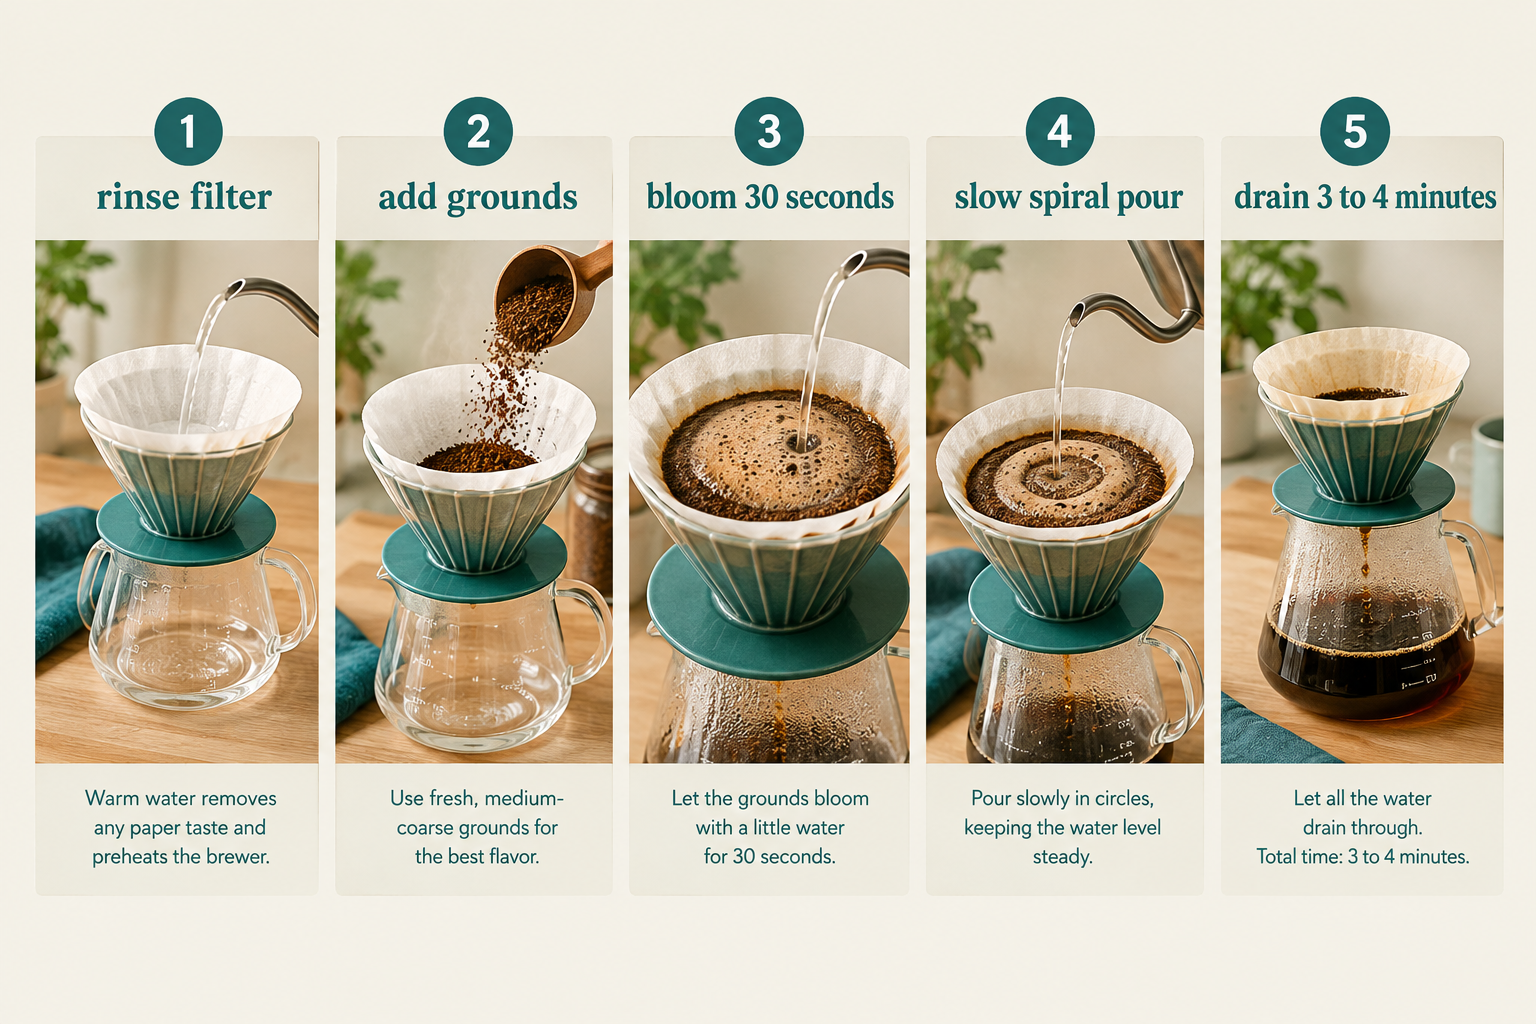
To brew with a Blue Bottle dripper, rinse the filter, add 24 grams of medium-coarse coffee for a 12 oz cup, and bloom it with 50 grams of water at 195°F to 205°F. Then pour in slow circles up to 360 grams total. The whole brew should drain in about 3 to 4 minutes.
The Complete Guide to Using a Blue Bottle Coffee Dripper
Have you ever wondered how to achieve that perfect cup of coffee right in the comfort of your home? The Blue Bottle Coffee Dripper offers a unique and complete method to improve your coffee brewing experience to professional standards. This guide will look at every aspect of using the Blue Bottle Coffee Dripper, from understanding its design principles to optimizing your brewing process.
Understanding the Blue Bottle Coffee Dripper
The Blue Bottle Coffee Dripper is designed for precision and consistency, offering coffee enthusiasts the tools to extract the best flavors from their beans. Unlike traditional coffee makers, this dripper emphasizes control over the brewing variables, catering to those who appreciate the nuances of fine coffee.
Key Features of the Blue Bottle Coffee Dripper
The unique design of the Blue Bottle Coffee Dripper makes it stand out. Here are its key features:
| Feature | Description |
|---|---|
| Material | High-quality, BPA-free plastic or ceramic |
| Design | Conical shape with ridges for optimal water flow |
| Filter | Uses proprietary Blue Bottle paper filters, known for their thicker texture |
| Portability | Lightweight and compact, making it ideal for both home use and travel |
Setting Up Your Blue Bottle Coffee Dripper
Proper setup is fundamental to achieving the best brew. Here’s a step-by-step guide to get you started.
Gathering Your Supplies
Before you begin, gather all the necessary materials. Here’s what you’ll need:
- Blue Bottle Coffee Dripper
- Blue Bottle paper filters
- Freshly roasted coffee beans
- A grinder
- A kettle (preferably with a gooseneck spout)
- A scale
- A timer
- Your favorite coffee mug
Prepping Your Equipment
Prepping your equipment ensures that every element of your brew is optimal.
- Rinse the Filter: Place the paper filter in the dripper and rinse it thoroughly with hot water. This removes any papery taste and preheats the dripper.
- Warm the Mug: Pour hot water into your coffee mug to preheat it, and then discard the water before brewing.
- Measure Your Coffee: Use a scale to measure out the right amount of coffee beans. A standard ratio is 1:15, coffee to water. For a 12-ounce cup, you’ll need about 24 grams of coffee.
Grinding Your Coffee
Grinding is one of the most key steps in brewing. The size and consistency of the grind can significantly affect the flavor of your coffee.
Choosing the Right Grind Size
For the Blue Bottle Dripper, a medium-coarse grind is recommended. This grind size allows for a balanced extraction, enhancing the complexity of the coffee.
Using a Grinder
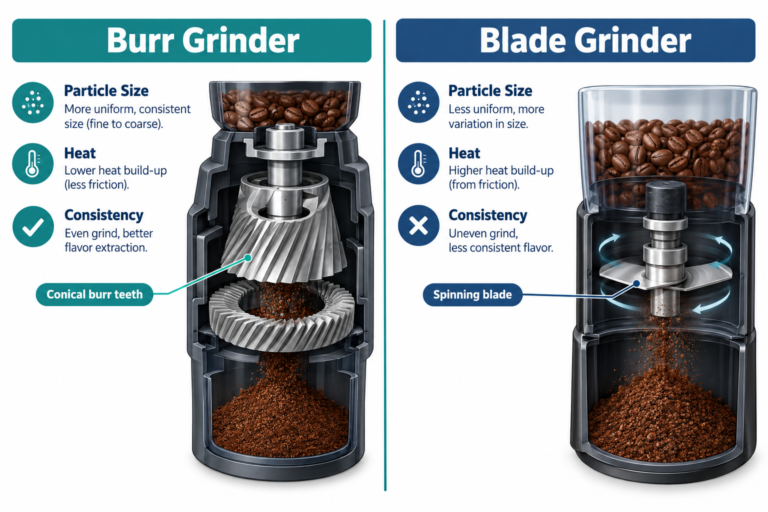
Use a burr grinder for the most consistent grind. Here’s how you could proceed:
- Set your grinder to a medium-coarse setting.
- Add the measured coffee beans.
- Grind the beans and ensure they have a uniform size.
The Brewing Process
The brewing process with a Blue Bottle Coffee Dripper involves precision and patience. Here’s a detailed guide to help you through each step.
Boiling the Water
Use filtered water to improve the flavor profile of your coffee. The ideal temperature for brewing is between 195°F and 205°F.
Initiating the Bloom
The “bloom” is a key step where hot water is first poured over the coffee grounds to release trapped gases. This improves the overall extraction process.
- Pour 50 grams of water (twice the weight of the coffee) over the grounds.
- Let it sit for 30-45 seconds.
Main Pour
This step involves multiple pours to ensure even extraction.
- First Pour: Slowly pour water in a circular motion, starting from the center and moving outwards. Pour until the weight reaches about 150 grams.
- Second Pour: Allow the water to drain halfway before continuing. Add more water in the same circular motion until you reach the desired weight, usually around 350 grams.
- Final Pour: Continue the process until all the water is through the dripper. The total brewing time should be around 3-4 minutes.
Fine-Tuning Your Brew
Every coffee bean is unique, and so is each person’s taste preference. Fine-tuning your brew can help you achieve the perfect cup that suits you.
Adjusting Grind Size
If your coffee tastes too bitter, try a coarser grind. If it’s too sour or watery, opt for a finer grind.
Modifying Water Temperature
Experimenting with water temperature within the optimal range (195°F to 205°F) can also affect the flavor. A lower temperature tends to highlight the acidity, while a higher temperature can improve bitterness or body.
Tuning the Coffee-to-Water Ratio
Adjusting the ratio of coffee to water can significantly impact the strength and flavor. If your coffee is too strong, increase the amount of water. Conversely, if it’s too weak, add more coffee.
Cleaning and Maintenance
Proper cleaning and maintenance of your Blue Bottle Coffee Dripper ensure longevity and consistent performance.
Daily Cleaning
After each use, rinse the dripper and the filter holder with warm water. Ensure no coffee grounds or residue remain.
Deep Cleaning
Once a week, deep clean your dripper to remove any oil build-up. Use a mixture of warm water and mild dish soap, and gently scrub with a soft sponge. Rinse thoroughly with hot water.
Troubleshooting Common Issues
Even with the best equipment and techniques, you might encounter some common issues. Here’s how to troubleshoot them.
Coffee Tastes Bitter
- Possible Causes: Over-extraction, too fine grind size, too high water temperature.
- Solutions: Use a coarser grind, reduce brewing time, or lower the water temperature.
Coffee Tastes Sour
- Possible Causes: Under-extraction, too coarse grind size, too low water temperature.
- Solutions: Use a finer grind, increase brewing time, or raise the water temperature.
Slow Brewing Time
- Possible Causes: Clogged filter, too fine grind size.
- Solutions: Ensure the filter and dripper are clean, and check your grind size.
Fast Brewing Time
- Possible Causes: Too coarse grind size, improper pouring technique.
- Solutions: Use a finer grind and practice a consistent pouring method.
Advanced Techniques for the Aficionado
For those looking to take their brewing to the next level, here are some advanced techniques.
Pulse Pouring
Pulse pouring involves adding water in smaller increments, allowing the coffee grounds to settle between pours. This technique can improve clarity and highlight subtle flavors.
Agitation Technique
Gently stirring the coffee grounds during the blooming phase can promote even extraction. Be careful not to over-agitate, as it might lead to over-extraction.
Experiment with Single-Origin Beans
Single-origin beans offer unique flavor profiles that reflect their geographical origin. Experimenting with these can improve your coffee experience.
Blue Bottle Dripper Recipe Chart by Mug Size
Start at 1:15 for a fuller cup and move to 1:16 if it tastes heavy. Weigh the water, not the mug, because the grounds hold back roughly twice their weight in water, so a 12 oz brew fills a 12 oz mug a little short. Our pour over coffee ratio guide explains the math behind these numbers.
| Mug size | Water | Coffee at 1:15 | Coffee at 1:16 |
|---|---|---|---|
| 8 oz | 240 g | 16 g | 15 g |
| 10 oz | 300 g | 20 g | 19 g |
| 12 oz | 360 g | 24 g | 22.5 g |
| 16 oz | 480 g | 32 g | 30 g |
A Timed Pour Schedule for 24 Grams of Coffee
This schedule fits the 12 oz row above. Start the timer when the first water hits the grounds and pour with a gooseneck kettle if you have one.
- 0:00: pour 50 g to bloom and wet every ground. A gentle swirl helps the dry pockets.
- 0:45: pour in slow circles up to 150 g, keeping the stream off the paper.
- 1:30: pour up to 250 g once the level has dropped by about a third.
- 2:15: pour the rest, up to 360 g.
- About 3:15 to 3:45: the bed should be drained and flat. A mound in the middle or grounds stuck high on the walls means the pour drifted to one side.
A kettle with a thin spout makes the circles much easier to keep small. Our best gooseneck kettle picks compare flow control and temperature settings.
How the Blue Bottle Dripper Compares With Other Drippers
Every pour over dripper makes a trade between speed, forgiveness and body. This is how the common home options line up, so you know what you gain or give up with each.
| Dripper | How it drains | Best for |
|---|---|---|
| Blue Bottle Dripper | Uses its own shaped paper filters | People who like the look and want one brand’s filters to reorder |
| Hario V60 | Cone with one large hole, so your pour speed controls the flow | Brewers who enjoy fine control and bright, clear cups |
| Kalita Wave | Flat bed with three small holes | Beginners who want the same cup every morning |
| Chemex | Thick bonded filter, slower drain | Brewing for two or more with a very clean cup |
If you are still choosing a dripper, our best pour over coffee maker guide compares drippers and machines side by side.
Filters and Availability in 2026
2026 update: Blue Bottle’s US store still has a product page for its paper filters, and the dripper appears on Amazon both alone and in a set with 30 filters. Dripper stock moves around, so check the listing before you plan a gift. Buy a spare pack of the matching filters when you buy the dripper. Running out of a brand-specific filter on a Monday morning is a special kind of disappointment.
FAQ
How much coffee do you use in a Blue Bottle dripper?
Use about 24 grams of coffee for a 12 oz cup at a 1:15 ratio, with 360 grams of water. For an 8 oz mug, 16 grams of coffee and 240 grams of water is a good start.
How long should a Blue Bottle dripper brew take?
A 12 oz brew should finish draining in about 3 to 4 minutes, bloom included. If it runs longer, grind coarser. If it finishes well under 3 minutes and tastes thin, grind finer.
What grind size works best in a Blue Bottle dripper?
A medium to medium-coarse grind, about the texture of coarse sand, works best in a Blue Bottle dripper. Change one step at a time and judge each change by taste and drain time. More pour over guides live on the Coffee Rank IQ homepage.
Conclusion: Mastering Your Blue Bottle Coffee Dripper
Mastering the Blue Bottle Coffee Dripper requires practice and attention to detail. By understanding and controlling the variables involved, grind size, water temperature, pouring technique, and coffee-to-water ratio, you can consistently brew exceptional coffee. This guide aims to provide you with the knowledge and confidence to explore and perfect your coffee brewing skills with the Blue Bottle Coffee Dripper.
Keep in mind, every cup of coffee you brew with your Blue Bottle Coffee Dripper is an opportunity to explore new flavors and refine your technique. Enjoy the routine, and here’s to countless delightful coffee experiences!
Keep Exploring Coffee Rank IQ
- Coffee Rank IQ home: reviews, brewing guides, and coffee science
- Top Tips For Making The Most Of Your Blue Bottle Coffee Subscription
- The Complete Guide To Using The Cafellissimo Paperless Pour Over Coffee Dripper
- Best Manual Coffee Grinder for Pour Over, Espresso, and Travel
- Best Pour Over Coffee Maker: Drippers vs Machines Compared