Espresso Workflow: A Step by Step Routine From Bean to Cup
Imagine yourself in the cozy corner of your favorite coffee shop, savoring the aroma of freshly brewed espresso. Now, picture being the master behind the perfect espresso, impressing your friends and family with your barista skills. With “Advanced Espresso: The Complete Step-by-Step Guide To Perfecting Your Brew,” you will start a routine of coffee craftsmanship. This complete guide will take you through every detailed step, from selecting the finest beans to achieving that sought-after velvet-smooth crema. Say goodbye to mediocre cups of joe and say hello to your newfound espresso mastery.
A good espresso workflow runs in the same order every time: heat the machine, weigh the beans, grind, distribute, tamp, lock in, pull the shot by weight, then flush and wipe. A fixed order makes each shot repeatable, so when the taste changes you know which variable moved and can fix it in one step.
Understanding Espresso Beans
Espresso is not just ordinary coffee; it is a unique brewing method that requires specific beans to achieve that rich and flavorful taste. But with so many espresso beans available, how do you choose the best one for your brew? Let’s explore the different types of espresso beans to help you make an informed decision.
Different types of espresso beans
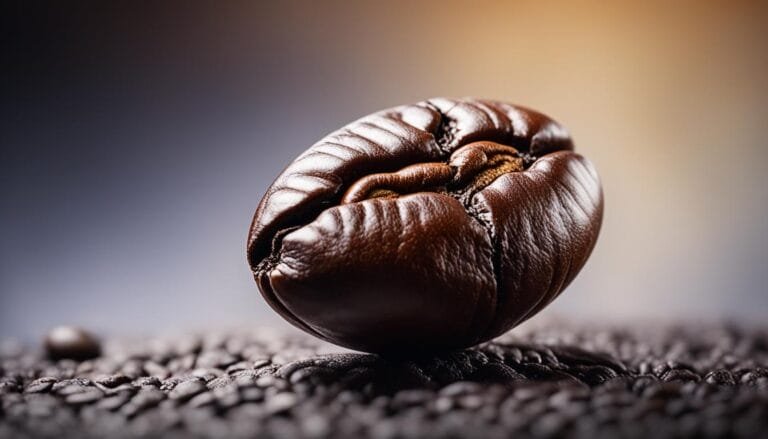
Espresso beans come in various varieties, each offering distinct flavors, aromas, and strength profiles. The most common types of espresso beans are Arabica and Robusta.
-
Arabica Beans: These beans are known for their delicate and subtle flavors, with notes of fruits, berries, and chocolate. Arabica beans have a lower caffeine content and a higher acidity level, making them perfect for those who prefer a smooth and mellow espresso experience.
-
Robusta Beans: Robusta beans, on the other hand, have a stronger and more pronounced flavor profile. They are bold and intense, with higher caffeine content and a bitter taste. Robusta beans are ideal for espresso lovers who enjoy a more solid and punchy flavor.
Besides Arabica and Robusta, there are also blends available, which combine both types of beans to create a unique and balanced espresso experience. Experimenting with different blends is an excellent way to discover your preferred flavor profile.
How to choose the best beans for espresso
Selecting the best beans for your espresso is key in achieving a satisfying brew. Here are a few factors to consider:
-
Freshness: Look for beans that have been recently roasted and are within a few weeks of the roast date. Fresh beans retain their flavors and aroma, resulting in a more vibrant and enjoyable espresso.
-
Roast Level: Espresso beans are typically roasted to a medium or dark level to improve their flavors and develop rich chocolatey notes. Experiment with different roast levels to find the one that suits your taste preferences.
-
Origin: Consider the origin of the beans as it can greatly influence the flavor profile. Different regions produce beans with unique characteristics. For example, Ethiopian beans are known for their fruity and floral notes, while Brazilian beans often have nutty and chocolate undertones.
-
Brand Reputation: Opt for reputable coffee brands that are known for their quality beans. Read reviews and ask for recommendations from fellow coffee enthusiasts to ensure you’re selecting beans from a trusted source.
By considering these factors, you can choose beans that cater to your taste preferences and create a delightful espresso experience.
Bean composition and flavor profile
Understanding the composition of espresso beans can provide valuable insights into the taste and aroma they will impart to your brew.
-
Acidity: The acidity level of beans affects the overall brightness and liveliness of your espresso. Higher acidity offers a tangy and vibrant taste, while lower acidity provides a smoother and more mellow flavor.
-
Body: The body of a coffee refers to its weight and texture on the palate. Espresso beans with a fuller body have a thick and creamy feel, while those with a lighter body are more delicate and tea-like.
-
Aroma: The aroma of espresso beans is often complex and can range from floral and fruity to earthy and nutty. Pay attention to the fragrance of the beans, as it can greatly improve your overall espresso experience.
-
Flavor Notes: Espresso beans can have a variety of flavor notes, such as chocolate, caramel, citrus, berries, or spices. Exploring different beans can help you discover your preferred flavor profiles and create a truly personalized espresso.
By familiarizing yourself with the composition and flavor profiles of espresso beans, you can make educated choices that result in a more enjoyable and matched brew.
Properly Storing Espresso Beans
To preserve the freshness and flavor of your espresso beans, proper storage is key. Just as the way you handle and store food affects its quality, espresso beans require special care to maintain their optimal taste. Let’s look at the importance of proper storage, ideal conditions, and common mistakes to avoid.
The importance of proper storage
Ensuring your espresso beans are stored correctly helps retain their freshness, aroma, and flavor for an extended period. Exposure to air, light, heat, and moisture can cause the beans to deteriorate quickly, resulting in a subpar espresso experience. By following proper storage practices, you can savor each cup of espresso as if it were freshly roasted.
Ideal storage conditions
Here are some guidelines to ensure your beans stay fresh and flavorful:
-
Use an Airtight Container: Store your beans in an airtight container to prevent exposure to air, which leads to oxidation. Vacuum-sealed containers or bags with a degassing valve are especially effective in maintaining freshness.
-
Keep Away from Light: Light can degrade the quality of your beans, leading to flavor loss and stale espresso. Store your container in a dark and cool place, such as a pantry or cupboard, away from direct sunlight.
-
Optimal Temperature: Espresso beans are best stored in a cool and dry environment, with a temperature range of 55-70°F (12-21°C). Skip the refrigerator, where moisture and food odors creep in. The freezer works for beans you will not use within a couple of weeks, as long as they go in airtight, single-use portions that are not thawed and refrozen.
-
Minimize Moisture Exposure: Moisture can lead to mold growth and compromise the flavor of your beans. Avoid storing them near any source of moisture, such as the sink or refrigerator.
Common mistakes in storing espresso beans
To maintain the quality of your espresso beans, avoid these common storage mistakes:
-
Storing in the Original Packaging: Many specialty bags have a one-way valve and a zip seal and work fine if you press the air out after each use. Paper bags, folded bags without a seal, and loose-lidded tins are the ones to move into an airtight container.
-
Excessive Grinding: Grinding the beans in large quantities and storing the coffee grounds can cause rapid flavor loss. It is best to grind your beans just before brewing for the freshest taste.
-
Improper Temperature Control: Extremes in temperature can damage the beans and spoil their flavor. Avoid exposing them to direct sunlight or keeping them near a heat source.
By implementing these proper storage practices and avoiding common mistakes, you can ensure your espresso beans stay fresh and deliver a delightful cup of coffee every time.

Grinding Your Beans
Now that you have your carefully selected espresso beans, it’s time to look at the essential step of grinding. Grinding your beans just before brewing allows you to extract the maximum flavors and aromas, resulting in a truly exceptional espresso. Let’s explore choosing the right grinder, different levels of grind consistency, and tips for grinding espresso beans.
Choosing the right grinder
Investing in a quality grinder is essential for achieving consistent and precise grind size. There are two main types of coffee grinders: blade grinders and burr grinders.
-
Blade Grinders: Blade grinders use rotating blades to chop the beans into smaller particles. While these grinders are more affordable, they often produce uneven grind sizes, which can lead to inconsistent extraction and undesirable flavors in your espresso.
-
Burr Grinders: Burr grinders crush the beans between two abrasive surfaces, resulting in a more uniform grind size. They offer greater control over the grind size, allowing you to adjust it according to your specific espresso brewing method.
For the best results, it is recommended to invest in a burr grinder, preferably one with adjustable settings. This ensures that you can achieve the desired grind consistency for your preferred espresso extraction.
Different levels of grind consistency
The grind size you choose greatly influences the flavor profile of your espresso. Here are the main levels of grind consistency for espresso brewing:
-
Fine Grind: Fine grind is the standard for espresso in a regular, non-pressurized basket. The particles will be small and powdery, similar to fine sand. This level of grind allows for slower water flow and prolonged contact with the coffee, resulting in a more concentrated and intense shot.
-
Medium-Fine Grind: This slightly coarser setting suits pressurized (dual-wall) baskets, which build pressure through a tiny exit hole and forgive a less precise grind. The particles are slightly larger than fine grind, resembling table salt. It offers a balanced extraction with a good balance of strength and flavor.
-
Medium Grind: Medium grind, similar to granulated sugar, is too coarse for any espresso machine. Water rushes through it and the shot comes out sour and watery, so save this setting for drip brewers and pour over.
Experimenting with different grind sizes and extraction times is key to finding the perfect balance and achieving your desired flavor profile.
Tips and techniques in grinding espresso beans
To ensure a consistent and flavorful grind, consider the following tips and techniques:
-
Grind Just Before Brewing: To preserve the freshness and aroma, grind your espresso beans just before brewing. This minimizes flavor loss and allows you to extract the maximum flavors from the beans.
-
Adjust to Your Brewing Method: Different brewing methods require specific grind sizes to achieve the best results. Experiment with different settings to find the ideal grind size for your espresso machine.
-
Consistency is Key: Aim for a consistent grind size throughout. Variations in particle size can result in an uneven extraction and an imbalanced taste profile.
-
Use the Right Amount: Measure the appropriate amount of beans for your desired shot size. Using too few or too many beans can affect the extraction time and overall flavor.
By investing in a quality grinder, understanding the different grind consistencies, and implementing proper grinding techniques, you can improve your espresso brewing experience and enjoy a truly exceptional cup of coffee.
Mastering the Dosage
For creating the perfect shot of espresso, dosage plays a key role. Dosage refers to the amount of coffee used in one extraction, and it greatly impacts the strength, flavor, and overall quality of your espresso. Let’s look at what dosage is, how to measure it effectively, and how to adjust it based on your desired espresso strength.
What is dosage?
Dosage, in the context of espresso brewing, refers to the amount of ground coffee used to make a single shot. It is typically measured in grams and can vary depending on personal preference and the desired strength of the espresso.
How to measure dosage effectively
To measure your coffee dosage accurately, follow these steps:
-
Use a Digital Scale: Invest in a digital scale to measure the exact weight of your coffee. This ensures precision and consistency in your brews.
-
Set Your Dosage: Determine your desired dosage based on your equipment, brewing method, and personal taste preferences. A typical starting point is 18-20 grams for a double shot of espresso.
-
Tare the Scale: Place your portafilter or cup on the scale and tare it to zero. This ensures that only the weight of the coffee is measured.
-
Grind and Weigh: Grind your coffee to the desired coarseness, and then transfer it to the portafilter. Weigh the filled portafilter on the scale and adjust the coffee dose as needed.
Consistently measuring and adjusting your dosage will enable you to achieve the desired strength and flavor profile in your espresso shots.
Adjusting dosage based on espresso strength
Dosage plays a significant role in determining the strength of your espresso. If you find your shots are too weak or too strong, adjusting the dosage can help achieve your desired taste. Here are a few guidelines:
-
Weak Espresso: If your espresso is weak and lacks flavor, consider increasing the dosage. Gradually increase the amount of coffee by a gram or two and evaluate the taste until you reach the desired strength.
-
Strong or Bitter Espresso: If your espresso tastes bitter or overpowering, reducing the dosage can help balance the flavors. Decrease the amount of coffee by a gram or two and taste the result before making further adjustments.
Keep in mind that taste preferences can vary, so adjust the dosage based on your desired strength and flavor profile. By carefully measuring and adjusting the dosage, you can take control of your espresso brewing and craft a perfect shot every time.

Perfecting the Tamping
Tamping is a key step in the espresso brewing process, often overlooked but vital in achieving an even and consistent extraction. It ensures proper water flow through the coffee grounds, resulting in a balanced and flavorful shot. Let’s explore the basics of tamping, correct tamping pressure, and common tamping problems and solutions.
The basics of tamping espresso
Tamping involves applying even pressure to the coffee grounds to create a flat and uniform surface in the portafilter. This promotes optimal water flow and prevents channeling, where water finds the path of least resistance, resulting in an uneven extraction.
To tamp effectively, follow these steps:
-
Prepare the Coffee: Distribute the ground coffee evenly in the portafilter, ensuring there are no clumps or uneven pockets.
-
Position the Tamper: Place the tamper evenly on top of the coffee grounds, with the handle at a comfortable angle.
-
Apply Pressure: Using the palm of your hand, apply even and downward pressure to the coffee grounds. Avoid exerting excessive force, as it can lead to overextraction and undesirable flavors.
-
Level and Polish: After applying pressure, give the tamper a slight twist to level the coffee surface. This ensures a consistent extraction and helps create a dense puck in the portafilter.
By mastering the basics of tamping, you can improve the overall quality of your espresso shots and achieve more consistent results.
Correct tamping pressure
The amount of pressure you apply during the tamping process is key to achieving an optimal extraction. The ideal tamping pressure should be firm and consistent but not excessive. Here are some tips to achieve the correct tamping pressure:
-
Find Your Sweet Spot: Experiment with different pressure levels to find your preferred tamping pressure. You should feel resistance but not strain or struggle while tamping.
-
Focus on Consistency: Consistency in tamping pressure is key. Avoid applying varying amounts of pressure from shot to shot, as this can result in inconsistent extraction and fluctuating flavors.
-
Use a Level Tamper: A tamper with a level surface can help distribute pressure evenly. This ensures a consistent tamping experience and promotes a balanced extraction.
Keep in mind, tamping is just one element in the espresso brewing process, and there are other factors that contribute to a well-extracted shot. By focusing on achieving a consistent tamping pressure, you can improve the overall quality and taste of your espresso.
Tamping problems and solutions
Tamping requires precision and attention to detail. Here are some common tamping problems you may encounter and their solutions:
-
Uneven Tamp: If you notice uneven extraction or channels forming in your espresso puck, it may indicate an uneven tamping surface. Ensure your tamper is level, and focus on applying even pressure throughout the tamping process.
-
Over-Tamping: Exerting too much pressure during tamping can lead to overextraction and result in bitter-tasting espresso. Reduce the amount of pressure and find the sweet spot that allows for a balanced extraction.
-
Under-Tamping: A loose, uneven tamp lets water rush through weak spots, which leads to a fast, weak, and underextracted shot. Increase the pressure gradually until you achieve the desired resistance and a consistent extraction.
-
Tamping at an Angle: Tamping at an angle can result in uneven extraction and an imbalanced flavor profile. Ensure your tamper is level throughout the tamping process to promote uniform water flow.
By addressing these tamping problems and implementing the appropriate solutions, you can refine your tamping technique and achieve more consistent and flavorful espresso shots.
Understanding Extraction
Extraction is the process by which water passes through the coffee grounds, extracting the desirable flavors, aromas, and compounds that make up a great shot of espresso. Understanding the science behind extraction is key to achieving optimum flavor and creating a truly exceptional espresso. Let’s explore the science of extraction, ideal extraction time, and the signs of under-extraction and over-extraction.
The science of extraction
Extraction is a delicate balance of time, temperature, pressure, and water flow. During the brewing process, water dissolves the soluble compounds from the coffee grounds, extracting flavors and aromas. These compounds include acids, sugars, oils, and volatile compounds.
Water acts as the solvent, while the coffee acts as the solute. Various factors affect the extraction process, in the end determining the taste and strength of your espresso.
The ideal extraction time
The ideal extraction time for espresso generally falls within a range of 25-30 seconds. This timeframe allows for the extraction of desirable flavors without over-extracting bitter compounds. But, it’s important to note that extraction time alone does not guarantee a perfect espresso.
Other factors such as grind size, dosage, water temperature, and machine pressure can influence the overall extraction process. Achieving the perfect balance of these factors is the key to a well-extracted shot.
Signs of under-extraction and over-extraction
Understanding the signs of under-extraction and over-extraction can help you evaluate the quality of your espresso and make necessary adjustments.
- Under-Extraction: Under-extracted espresso can taste weak, sour, or acidic. It may lack body and have a thin, watery texture. Signs of under-extraction include a rapidly flowing extraction, blonding (light-colored streams of espresso), and a lack of crema.
Possible causes of under-extraction include a coarse grind, insufficient dosage, low water temperature, and fast extraction times. Adjusting these variables can help correct the extraction and achieve a more balanced flavor profile.
- Over-Extraction: Over-extracted espresso tends to taste bitter, astringent, or burnt. It may have a heavy body and a lingering aftertaste. Signs of over-extraction include a slow and uneven extraction, dark or oily appearance, and excessive bitter flavors.
Over-extraction can occur due to a fine grind, excessive dosage, high water temperature, long extraction times, or too much pressure. Modifying these factors can help improve the extraction and create a more harmonious espresso.
By understanding the signs of under-extraction and over-extraction, you can fine-tune your brewing process and achieve a well-balanced, flavorful shot of espresso.
Controlling Water Temperature
Water temperature plays a key role in espresso extraction, as it directly impacts the solubility of coffee compounds and influences the flavor and texture of your espresso. Controlling water temperature accurately is essential in achieving optimum extraction and a truly exceptional cup of coffee. Let’s explore the ideal water temperature for espresso, the effects of water temperature on taste, and how to measure it accurately.
Ideal water temperature for espresso
The ideal water temperature for brewing espresso is typically between 195-205°F (90-96°C). This range allows for proper extraction of the coffee compounds, ensuring a well-balanced and flavorful cup.
Water that is too cold may result in under-extraction, leading to a weak and sour-tasting espresso. On the other hand, water that is too hot can cause over-extraction, resulting in bitter and burnt flavors.
Maintaining water temperature within this optimal range is vital for achieving consistency and unlocking the full potential of your espresso beans.
Effects of water temperature on taste
Water temperature greatly influences the taste and texture of your espresso. Here are the effects of different water temperatures on your brew:
-
Low Temperature (below 195°F/90°C): Brewing espresso with water below the recommended temperature can result in under-extraction. This can lead to a weak, sour, and acidic taste. The lack of heat may also result in a thinner body and reduced sweetness.
-
High Temperature (above 205°F/96°C): Water that is too hot can cause over-extraction and result in a bitter, astringent, or burnt taste. The increased heat can extract unwanted flavors and compromise the overall quality of your espresso.
-
Optimal Temperature (195-205°F/90-96°C): Water within the optimal temperature range allows for balanced extraction, highlighting the desirable flavors and aromas of the coffee. It creates a well-rounded and flavorful espresso with a pleasant acidity, body, and sweetness.
By controlling water temperature within the recommended range, you can ensure a consistent and delightful espresso experience.
How to accurately measure water temperature
Accurate measurement of water temperature is key for achieving the desired extraction. Here are a few methods for accurately measuring water temperature for your espresso:
-
Thermometer: Using a calibrated food thermometer, measure the water temperature before brewing. Ensure the thermometer is immersed in the water and not touching the sides or bottom of the container.
-
Built-in Temperature Controls: Some higher-end espresso machines come equipped with built-in temperature controls that allow you to set and maintain the desired water temperature. These machines provide precise temperature control, ensuring consistency in your brews.
-
Temperature strips: Temperature strips are adhesive strips that can be placed on the side of your espresso machine’s brew group. They provide a visual indication of the water temperature range during brewing.
Accurate water temperature measurement is instrumental in achieving a well-balanced and flavorful espresso. Implementing precise temperature control will help you open up the full potential of your beans and create exceptional espresso shots.
Maintaining your Espresso Machine
To ensure the longevity and performance of your espresso machine, regular maintenance and care are key. A well-maintained machine operates at its best, consistently producing high-quality espresso. Let’s look at the importance of regular cleaning and descaling, checking and replacing machine parts, and common espresso machine issues and fixes.
Regular cleaning and descaling
Regular cleaning of your espresso machine prevents the buildup of coffee residues, oils, and mineral deposits that can negatively impact the taste of your espresso. Here’s a cleaning and descaling routine to follow:
-
Daily Cleaning: After each use, clean the portafilter, basket, and steam wand thoroughly to remove any coffee grounds or milk residue. Wipe down the exterior of the machine and the drip tray.
-
Backflushing: Backflushing involves using a blind filter and a cleaning solution to remove oils and residue that accumulate over time. Follow the manufacturer’s instructions for backflushing frequency and the type of cleaning product to use.
-
Weekly Cleaning: Once a week with regular use, soak the basket and portafilter spouts in espresso machine cleaner and scrub around the shower screen and gasket with a group brush. Remove the shower screen for a deeper clean every month or two, and leave the gasket in place until it needs replacing.
-
Descaling: Depending on the water hardness in your area, descaling should be performed every few months to prevent mineral deposits from affecting the machine’s performance. Follow the manufacturer’s instructions for descaling frequency and the appropriate descaling solution.
By establishing a regular cleaning and descaling routine, you can keep your espresso machine in optimal condition, ensuring consistently clean and flavorful espresso shots.
Checking and replacing machine parts
Over time, certain parts of your espresso machine may wear out or become faulty. Regularly checking and replacing these parts is essential for maintaining the machine’s performance. Here are a few parts to monitor:
-
Group Gasket: The group gasket seals the portafilter to the machine, preventing leaks during extraction. A worn-out gasket can cause poor extraction and leaks. Inspect the gasket regularly and replace it when it becomes hard or cracked.
-
Shower Screen: The shower screen evenly distributes water over the coffee grounds during extraction. Mineral deposits and coffee oils can clog the screen, affecting water flow and extraction consistency. Clean the shower screen regularly, and replace it if necessary.
-
Water Filter: If your espresso machine has a built-in water filter, it is essential to follow the manufacturer’s instructions for replacing it. A clogged or expired filter can affect the taste and appearance of your espresso.
-
Seals and O-rings: Check the seals and O-rings throughout your machine for signs of wear or damage. Replace them if they are cracked, leaking, or no longer providing a proper seal.
By regularly inspecting and replacing these critical machine parts, you can ensure the longevity and performance of your espresso machine.
Common espresso machine issues and fixes
Occasionally, espresso machines may encounter issues that require troubleshooting. Here are some common problems and their possible solutions:
-
Low Water Pressure: Low water pressure can result in weak and under-extracted espresso. Check the water inlet and supply line for blockages or kinks. Clean the water reservoir regularly and ensure it is filled to the appropriate level.
-
Temperature Fluctuations: If your espresso machine experiences temperature fluctuations, it can result in inconsistent extraction and flavor. Check for loose connections, faulty thermostats, or mineral buildup in the heating element. Consult the manufacturer or a professional technician for assistance.
-
Leaks: Leaks can occur in various parts of the machine, such as the portafilter, steam wand, or water reservoir. Check the seals and O-rings for damage or wear. Tighten connections and replace faulty parts if necessary.
-
Grinder Issues: If your espresso does not taste as expected, the grinder may need adjustment or cleaning. Refer to the grinder’s user manual for instructions on adjusting grind size and cleaning the burrs.
For complex issues or those requiring technical expertise, it is best to consult the manufacturer’s customer service or a professional espresso machine technician.
By maintaining your espresso machine through regular cleaning, proper part replacement, and addressing common issues, you can enjoy consistent and high-quality espresso for years to come.
Art of Espresso Brewing
Espresso brewing is both an art and a science. It requires precision, attention to detail, and creativity to create a truly remarkable cup of coffee. Understanding the brewing process, common mistakes, and how to make different espresso-based drinks will help you perfect your craft.
Understanding the brewing process
The espresso brewing process involves several key steps that contribute to the final result. Understanding and mastering each step will help you achieve consistent and high-quality espresso:
-
Preheating: Preheat your espresso machine and portafilter to ensure stable brewing temperature throughout the extraction process.
-
Grinding and Dosing: Grind your beans to the appropriate size and dose the correct amount of coffee into the portafilter. Distribute the coffee evenly and tamp it consistently.
-
Brewing Time: Start the extraction and monitor the brewing time. Aim for a total extraction time of 25-30 seconds to achieve optimum flavor and balance.
-
Yield: The yield refers to the amount of espresso extracted. A common double shot today is measured by weight: about 36 grams of liquid from an 18 gram dose (a 1:2 ratio), which looks like roughly 2 ounces in the cup once you count the crema. Adjust the yield to your taste preferences by adjusting the dosage and extraction time.
By paying attention to each step of the brewing process, you can create a well-balanced and delicious shot of espresso.
Common brewing mistakes
To brew excellent espresso consistently, it’s essential to be aware of common brewing mistakes and how to avoid them. Here are a few mistakes to watch out for:
-
Inconsistent Tamping: Inconsistent tamping pressure can lead to an uneven extraction and inconsistent flavors. Ensure your tamping pressure is consistent from shot to shot.
-
Over- or Under-Extraction: Poor grind size, incorrect dosage, or improper extraction time can result in over- or under-extracted espresso. Adjust these variables to find the ideal balance.
-
Inadequate Preheating: Failing to preheat your espresso machine and portafilter can result in inconsistent temperatures and flavor fluctuations. Allow sufficient time for preheating before brewing.
-
Neglecting Cleaning and Maintenance: Neglecting to clean your machine and replace worn-out parts can compromise the taste and quality of your espresso. Establish a regular cleaning and maintenance routine.
By acknowledging these common mistakes and making the necessary adjustments, you can avoid them and consistently produce exceptional espresso.
How to make different espresso-based drinks
Once you have mastered the art of brewing espresso, you can explore espresso-based drinks. Here are a few popular espresso-based beverages and how to make them:
-
Cappuccino: Cappuccino is a classic espresso-based drink consisting of equal parts espresso, steamed milk, and milk foam. Start by extracting a shot of espresso, then add equal parts steamed milk and milk foam to create layers in the cup.
-
Latte: A latte is made by combining a shot of espresso with steamed milk and a thin layer of milk foam. Pour the steamed milk over the espresso, holding back the foam with a spoon. Finish with a dollop of foam on top.
-
Americano: An Americano is a simple yet elegant drink made by diluting a shot of espresso with hot water. Add hot water to the espresso shot, adjusting the amount to your desired strength. The result is a milder and more extended coffee experience.
-
Macchiato: A macchiato is a single or double shot of espresso “marked” or “stained” with a small amount of milk. Extract the espresso shot, then add a small dollop of steamed milk or milk foam to the top. This adds a touch of sweetness and complements the boldness of the espresso.
As you venture into making different espresso-based drinks, don’t be afraid to get creative and experiment with different ratios, flavors, and presentations. The possibilities are endless, allowing you to showcase your artistic flair and create unique and delightful espresso creations.
Perfecting the taste and presentation
Creating the perfect shot of espresso is not just about the technical aspects; it’s also about the aesthetics and the overall experience. Paying attention to tasting your espresso, presenting it beautifully, and even delving into advanced latte art techniques will improve your espresso brewing to a whole new level.
How to taste espresso
Tasting espresso allows you to explore and appreciate its complex flavors and aromas fully. Here’s a step-by-step guide to tasting espresso:
-
Smell the Aroma: Before taking your first sip, bring the espresso cup to your nose and inhale deeply. Pay attention to the aroma, noting any specific scent profiles such as chocolate, fruits, spices, or flowers.
-
Small Sips: Take small sips of the espresso, allowing it to spread across your palate. Let the flavors evolve and linger on your tongue. Pay attention to the taste profile, noting any acidity, sweetness, bitterness, or balance.
-
Analyze the Body: Observe the texture and body of the espresso. Is it thick and creamy, or light and delicate? The body provides insights into the coffee’s richness and depth.
-
Aftertaste: Notice the lingering aftertaste or finish of the espresso. Does it leave a pleasant, clean sensation, or does it have a lingering bitterness?
By taking the time to taste and analyze your espresso, you can refine your brewing technique and gain a deeper appreciation for the nuances within each cup.
Presentation tips
The visual presentation of your espresso can greatly improve the overall experience. Consider these presentation tips to create a visually appealing and Instagram-worthy espresso:
-
Beautiful Cups: Invest in aesthetically pleasing espresso cups that complement the color and crema of the espresso. Opt for cups with a thick base to retain heat and showcase the coffee’s visual richness.
-
Artful Garnishes: Add a touch of creativity to your espresso by garnishing it with chocolate shavings, cinnamon, or citrus zest. These artistic touches not only improve flavor but also create an eye-catching presentation.
-
Saucers and Accoutrements: Pair your espresso cup with a matching saucer and consider adding a small spoon or piece of biscotti for an extra touch of elegance.
-
Plating and Background: Pay attention to the surrounding environment when photographing your espresso. Choose a clean and visually pleasing background that improves the overall presentation.
By incorporating these presentation tips, you can improve the aesthetic appeal of your espresso and transform it into a truly remarkable sensory experience.
Advanced latte art techniques
Latte art is the pinnacle of espresso presentation, a beautiful combination of skill and creativity. With practice and patience, you can learn to create detailed designs on the surface of your lattes. Here are a few advanced latte art techniques to explore:
-
Rosetta: The rosetta is a classic latte art pattern that resembles a fern or leaf. It is free poured: you wiggle the pitcher side to side while drifting backward, then pull a thin line through the ripples, with no tool involved.
-
Tulip: The tulip design consists of a series of layered, stacked oval shapes resembling a tulip flower. Pouring technique and control are key in achieving this distinctive pattern.
-
Swan: The swan is a more complex and graceful design that requires precise control of milk flow. It involves creating layers of textured milk and drawing a swan shape atop the espresso crema.
-
Etching: Etching involves using a small tool or toothpick to draw detailed designs on the surface of the latte. This technique allows for more detailed and personalized artwork.
Mastering latte art takes practice, so don’t be discouraged if your first attempts aren’t perfect. With each pour, you’ll refine your technique and create stunning pieces of art atop your espresso.
By perfecting the taste, refining the presentation, and delving into advanced latte art techniques, you can make your espresso brewing a truly immersive and enjoyable experience for yourself and those lucky enough to savor your creations.
In conclusion, perfecting your espresso brewing skills involves understanding the different types of espresso beans, properly storing them, grinding to the right consistency, mastering dosage and tamping, understanding extraction, controlling water temperature, maintaining your espresso machine, and exploring the art of espresso brewing. By delving into each aspect of the process and paying attention to the details, you can improve your espresso experience and create a truly exceptional cup of coffee every time. Cheers to your espresso routine!
The Espresso Workflow, Start to Finish
Every step above works better in a fixed order. Here is the routine in one list, from a cold machine to a clean one.
- Turn the machine on early. Warm-up time varies a lot: a thermoblock or thermojet machine can be ready in about a minute, while a heavy E61 group can take 20 to 30 minutes to heat through.
- Flush and preheat. Lock in the empty portafilter and run a few seconds of water through the group. A cold basket steals heat from the first shot.
- Weigh the dose. Weigh the beans before grinding, 18 grams for a standard double basket, so every shot starts from the same number.
- Grind straight into the basket or a dosing cup. Grind right before brewing, never the night before.
- Distribute. Stir the grounds with a needle tool to break up clumps, then give the portafilter a light tap to level the bed.
- Tamp level. Press until the coffee stops compressing, keeping the tamper flat. Consistency matters more than force.
- Wipe, lock in, and start right away. Brush loose grounds off the rim so the gasket seals, and start the shot promptly so the puck does not sit against the hot group.
- Pull by weight. Set the cup on a scale and stop at your target, such as 36 grams out for 18 grams in. Note the time.
- Taste and log. Write down dose, yield, time, grind setting, and one word about the taste.
- Clean as you go. Knock out the puck, rinse the basket, flush the group, and purge and wipe the steam wand if you used it.
Two tools make steps 3 and 8 painless: a scale that reads to 0.1 gram with a built-in timer, covered in our best coffee scale guide, and a grinder with small, repeatable steps, covered in our best espresso grinder guide.
Daily, Weekly, and Monthly Upkeep
| When | Task | Why |
|---|---|---|
| Every shot | Flush the group, rinse the basket, purge and wipe the steam wand | Old coffee oil turns rancid fast, and dried milk blocks the wand tip. |
| Daily | Empty and rinse the drip tray; wipe the group gasket area with a brush | Stops grounds building up where the portafilter seals. |
| Weekly, with regular use | Backflush with espresso machine cleaner and a blind basket; soak the basket and spouts | Clears oil from the group. Only backflush machines with a three-way solenoid valve, and check the manual first. |
| Every month or two | Remove and scrub the shower screen; check the gasket for hardness or cracks | A clogged screen spreads water unevenly and invites channeling. |
| As the manual directs | Descale, on a schedule set by your water hardness | Limescale chokes boilers, valves, and heating elements. |
Our coffee machine descaling guide covers how often to descale and what to use. More espresso guides live on the Coffee Rank IQ homepage.
FAQ
What is WDT in espresso?
WDT, short for Weiss Distribution Technique, means stirring the grounds in the basket with thin needles to break up clumps before tamping. It spreads the coffee evenly, which lowers the chance of water channeling through weak spots.
How hard should you tamp espresso?
Tamp until the coffee stops compressing, then stop. Past that point extra force changes very little, so a level, repeatable tamp matters more than any number. The often-quoted 30 pounds is a habit, not a requirement.
Should you time espresso shots or weigh them?
Weigh them, and use time as a secondary check. Weight gives you the brew ratio, which drives strength and taste. Crema makes volume markings on a cup unreliable, so a scale under the cup is the more honest measure.